Redhead Hen Frond Part 2
By
Daniel " Feathers " Montano
Painting a Frond
By
Daniel " Feathers " Montano
Painting a Frond

This is part 2 of Daniel's Painting Demo of a Redhead hen Frond . Special thanks to Daniel " Feathers " Montana and Tom Matus for giving us the opportunity to be able to view a fine Demo like this and hope they have more in the future.

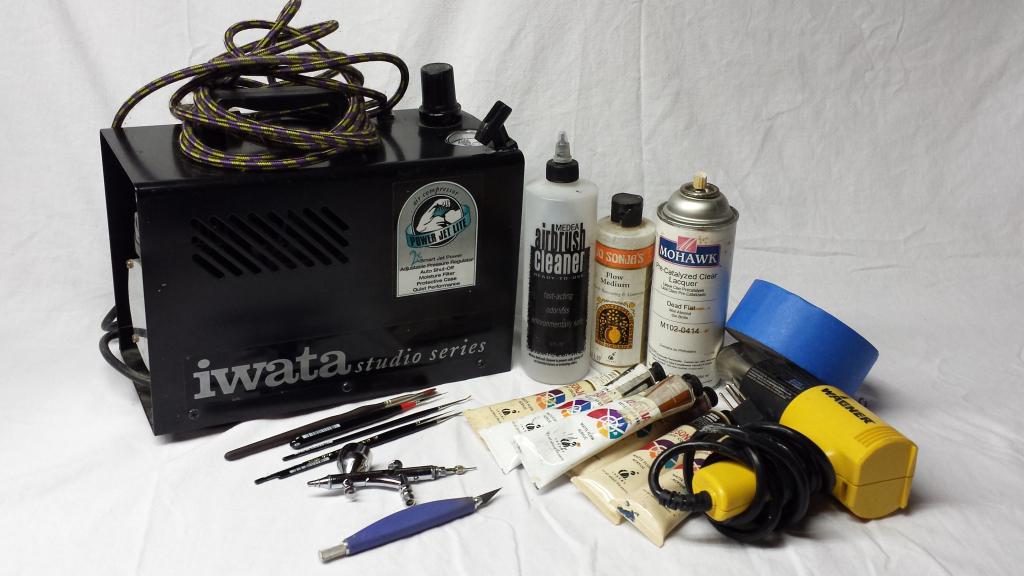
So here we are. Bare with me while I try to find my painting tools. Here is a
picture of the basic necessities you will need.
1)Iwata CMC-Plus Airbrush or
Any quality double action airbrush will do.
2)Iwata Studio Series-Power
Jet Lite- Air Compressor
3)I use Jo Sonjas and I only use acrylics.
Please keep in mind that this painting tutorial will be done with acrylics and
some materials used might react with oils.
4)Jo Sonja Flow
Medium
5) Medea Brand-Airbrush Cleaner
6)-Mohawk Brand Pre-
Catalyized Clear Lacquer-Dead Flat(M102-0414) and Satin
Finish(M102-0412)
7)Exacto knife
8)Blue painters tape
2"
9)Heat Gun..any brand
10) Prisma Color Pencils, brown
tones.
11) I only use one paint brush really..Inexpensive and really does the job. 10/0 or 18/0 7350 Liner by Lowe Cornell. You can use whatever you feel comfortable with.
As I begin, I will add certain materials needed.
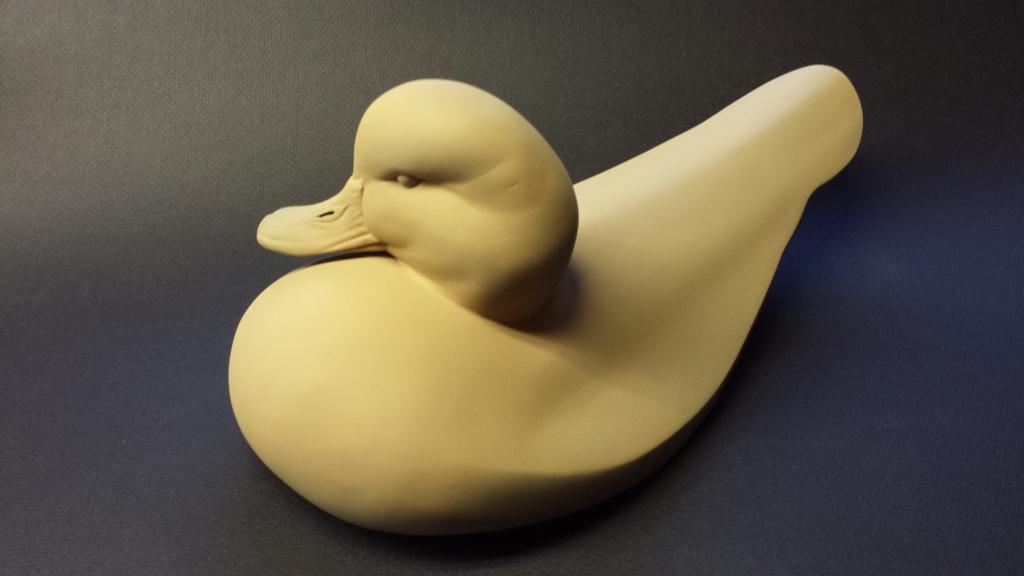
Ok the first thing I did was get some flow medium and airbrushed the entire bird, weird right.. I know. this helps the paint stick to the bird. I mixed raw sienna, unbleached titanium and burnt umber for the base coat. The color doesn't have to be an exact match to the bird, but close. It will be covered with correct tones as i go. I like to add layers of paint. I never wash my water so pretty much every color used will compliment each other. When mixing my paint, I like to add a few drops of airbrush cleaner. This helps break down the paint in case color wasn't completely mixed..kinda like a thinner for acrylics also helps with spatter from the airbrush. Once the base is dry (use a heat gun on every coat) I then add Burnt Umber mixed with unbleached titanium so that it's not too dark. I spray the areas that are dark as shown.
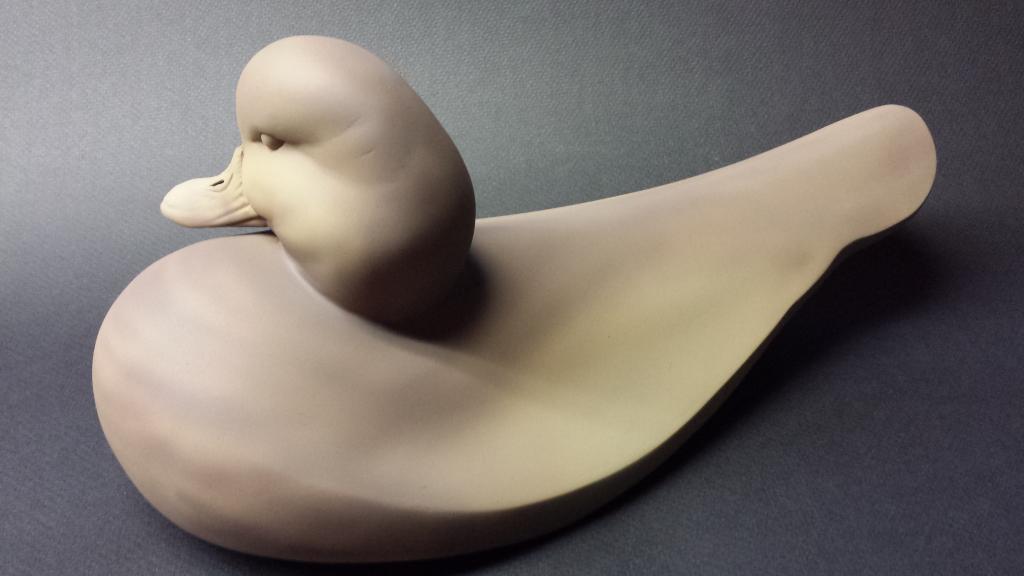
Keep in mind that this is just a base coat..so if it's too dark or too light, you can always come back and lighten or darken. In the breast area, I free hand feather formation or that scallop effect by adding smiles as I call it. This will help make the breast area soft when I start stenciling the feathers. I always start with the bill and work my way back to the tail, that's just how I've always done it.
Before I really get started , let me tell you about what airbrush I use. When I
first started to use an airbrush, I bought a 20.00 Badger single action, plastic
gun used with a co2 disposable tank. I am self taught. I practiced with stencils
and with color. It was great! So then I got a little more interested and curious
and stepped up to a PAASCHE single action. A little bit more precise. Not
knowing what a double action gun was, I saved a little money and bought a
Paasche VL-1 model. I was hooked. Press down for air and pull lever back for
paint . EASY!!! Thick and thin lines at your finger tips. So then I was
airbrushing every day and even landed a job at Sea World, free handing air
brushed tees. Before you know it, I was a pro. No stencils needed, even did that
fancy free hand, hand writing. Anyhow, I've played with quite a bit of air
brushes, from Paasche Vl's to the AB and now Iwata Custom Micron. It truly makes a world of a difference in price and selection. But it really depends on how
much experience you have. Please don't go out and spend 500.00 on a Iwata Micron if you have no clue on how an airbrush works. Takes time and patience and practice. I recommend an Iwata HP-But still pricey but an overall brush that can be used from fine detail to covering large areas on birds. If you shop around on EVILBAY you can find some under 100.00 used and sometimes new. Retail is about 200.00 Not to worry, a lower model Paashe or Iwata will be fine. I don't
recommend buying a 20.00 brush from the hardware store...they suck air, but
don't spit paint..lol
I'm using an Iwata Power jet Lite compressor retail about 300.00...but I started with cambell 2gal compressor..it all works, as long as you can get a minimum of 30PSI. I usually spray with 40-50PSI and with the Iwata CMC-Plus, you can control air from the valve integrated on the brush pretty cool. Another option which is cost efficient is a industrial c02 tank...down fall is you have to recharge when you're out. YOU can find Lowe Cornell brushes at Michaels Craft store or go to Jerry's Artarama.com for good prices.

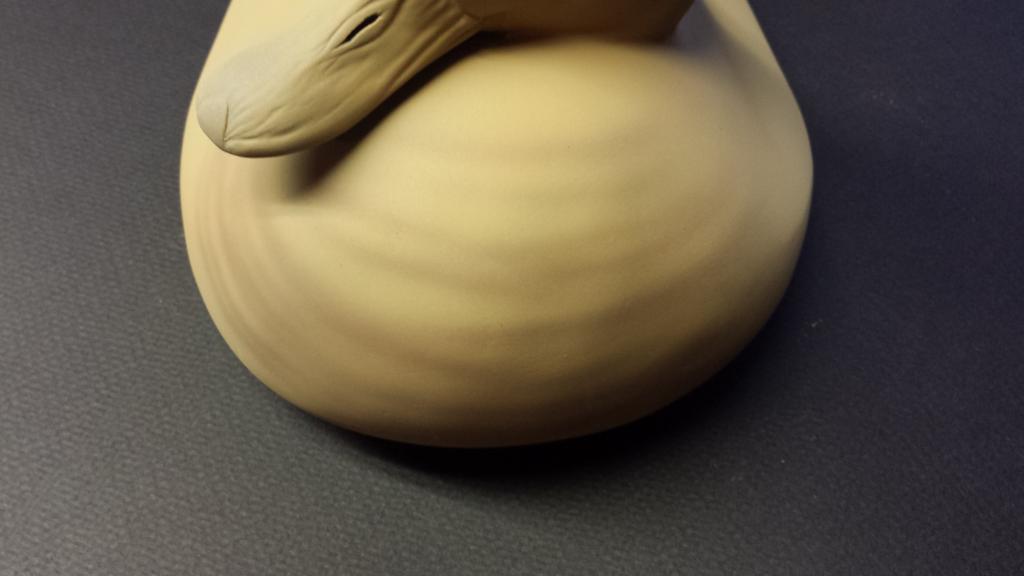
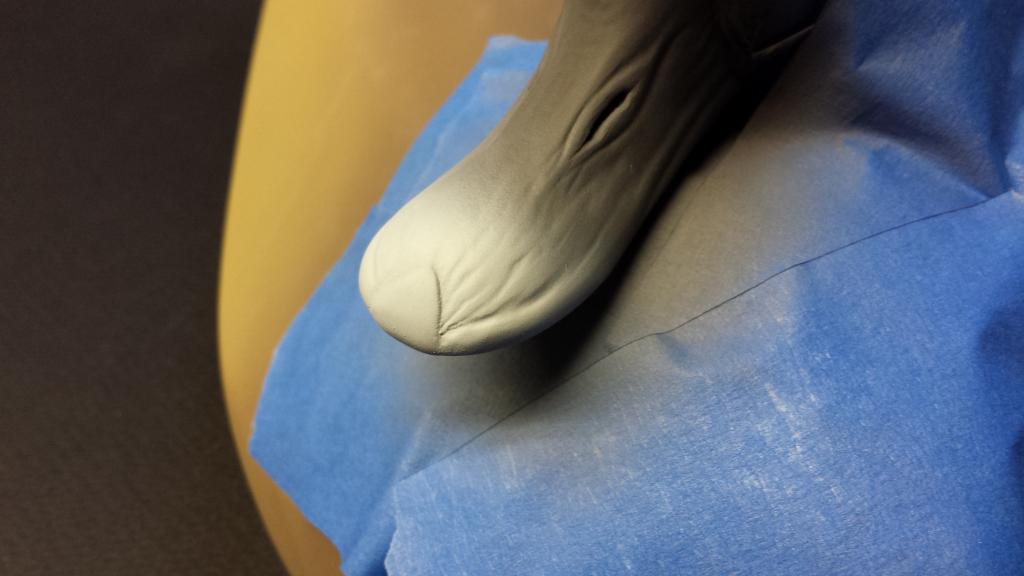
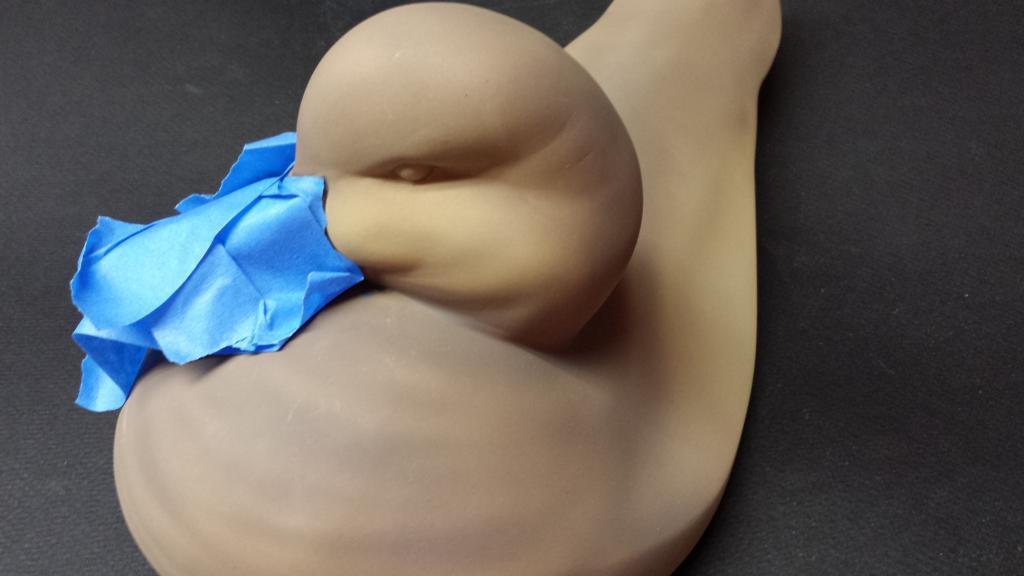
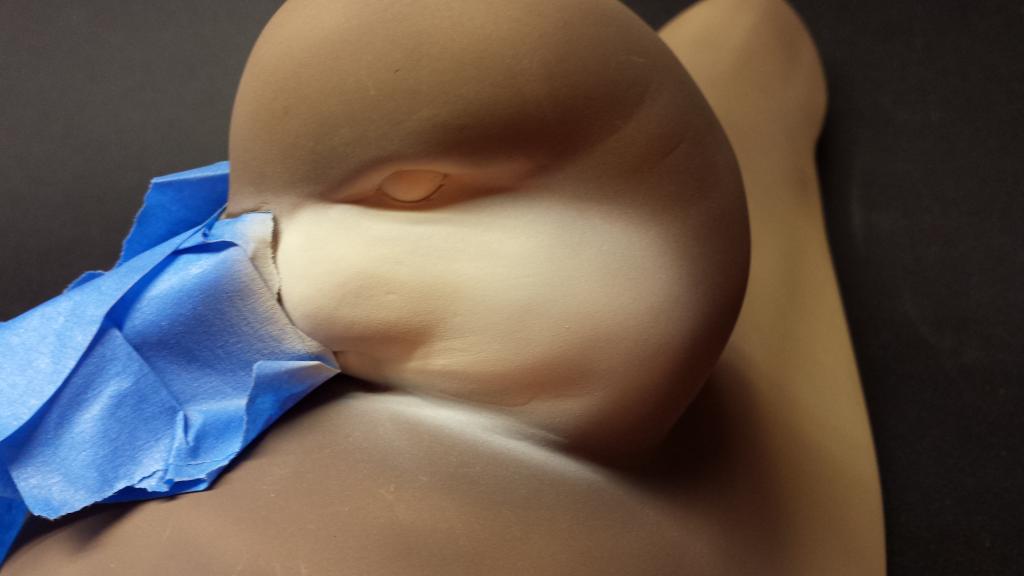
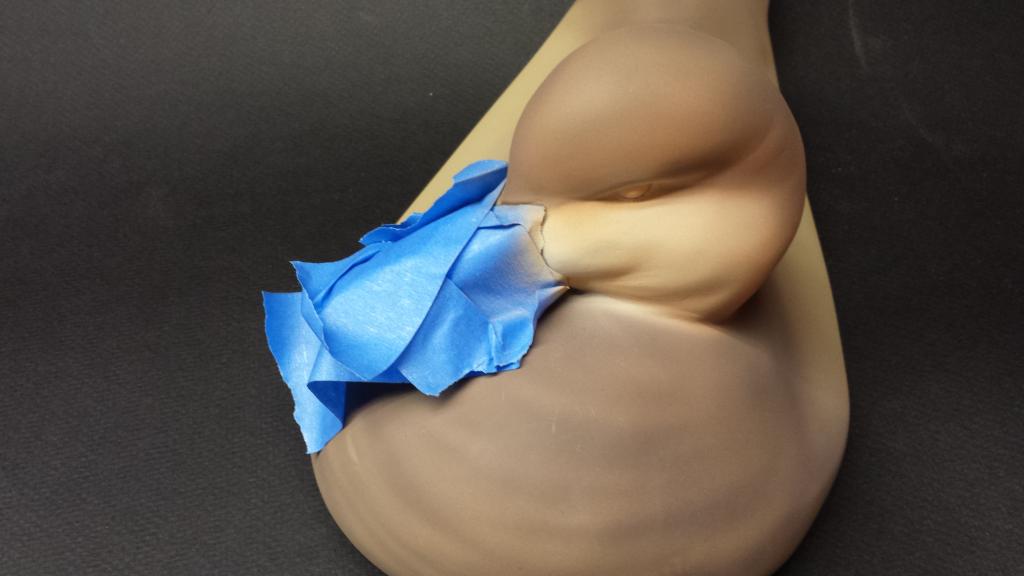
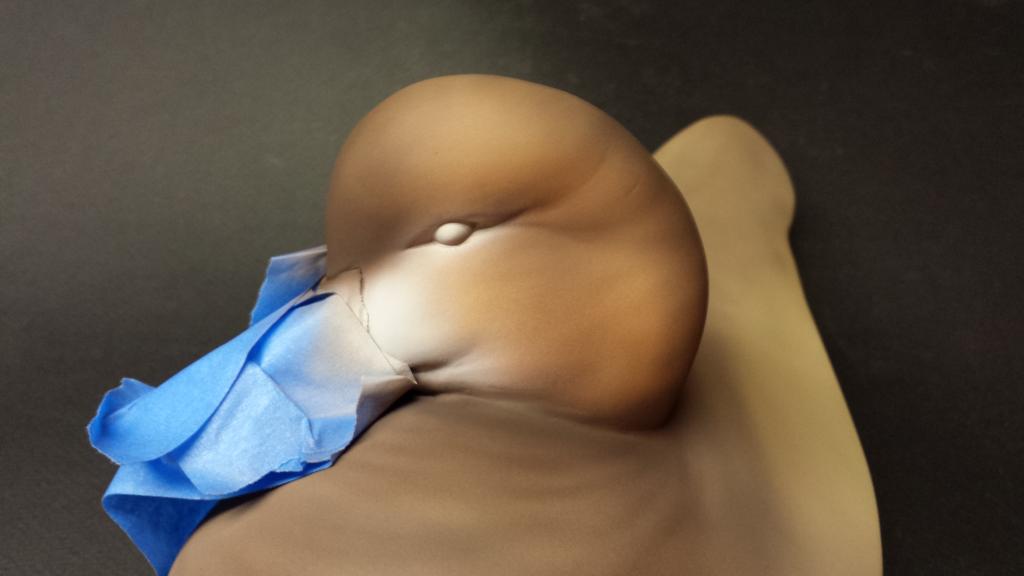
So I begin with masking the area around the bill. I do this because I will be applying a lacquer finish and I don't want over spray on the head.
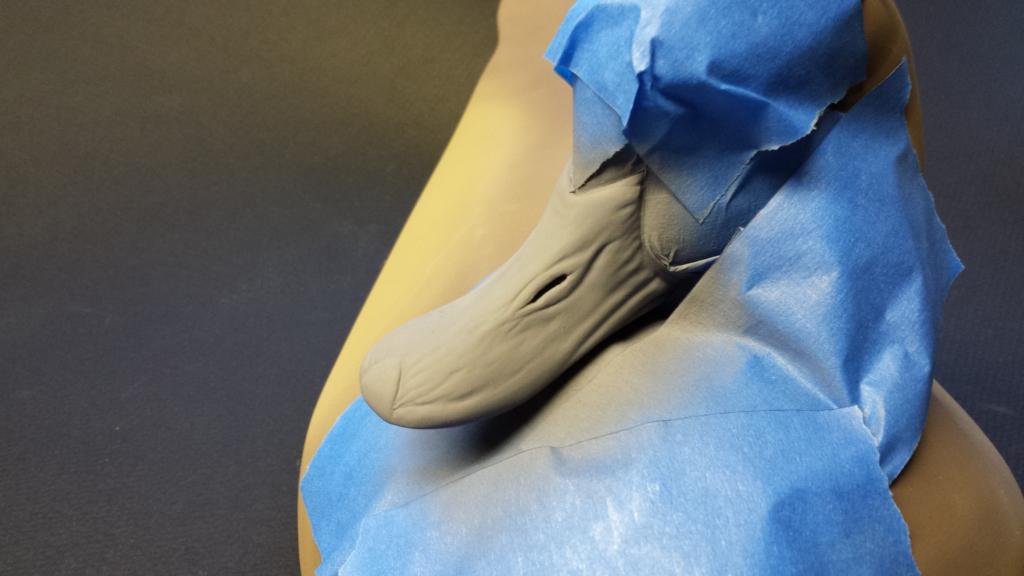
I mixed up a gray color, simple black and white and added a little purple to it. Refer to your reference material to get desired color.
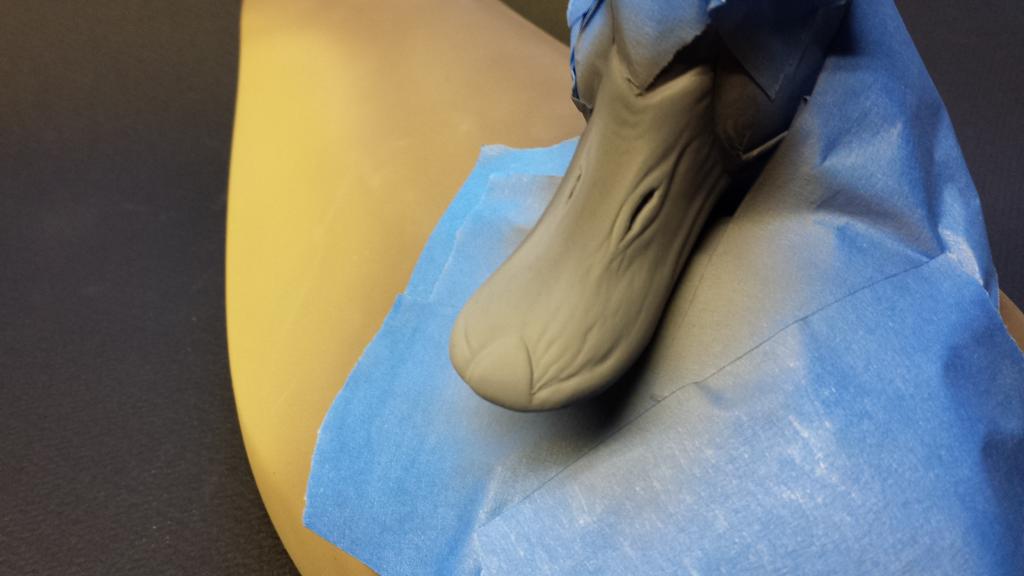
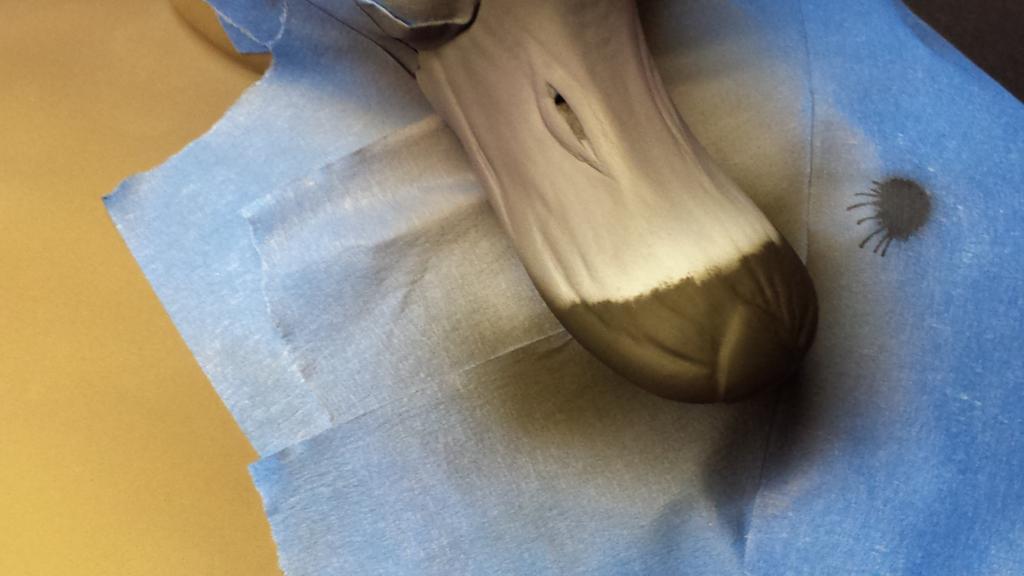
I now use carbon black and purple mixed to get a dark grayish color and air brush the side and top of bill. I always water down my colors. I layer my colors and paint wet.
I now add titanium white at the tip of the bill. Note where the white starts and finish.
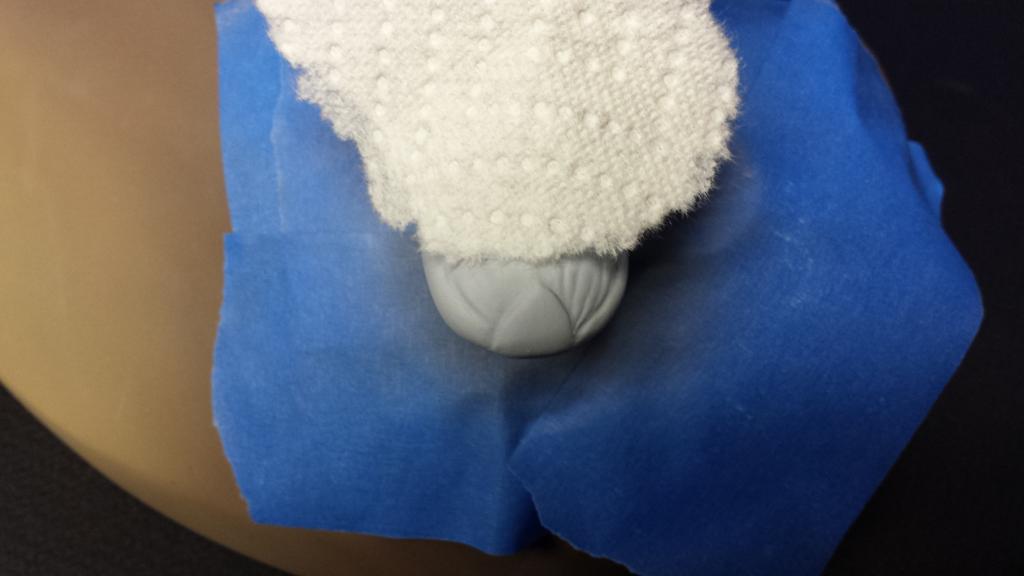
Here is a trick, I use a piece of paper towel and make a stencil out of it. I lay it where the black will end.
This is what it looks like once I spray it and remove paper towel.

The same color I used for the base coat on the bird, I will use on the lower side of bill. Raw sienna and unbleached titanium.
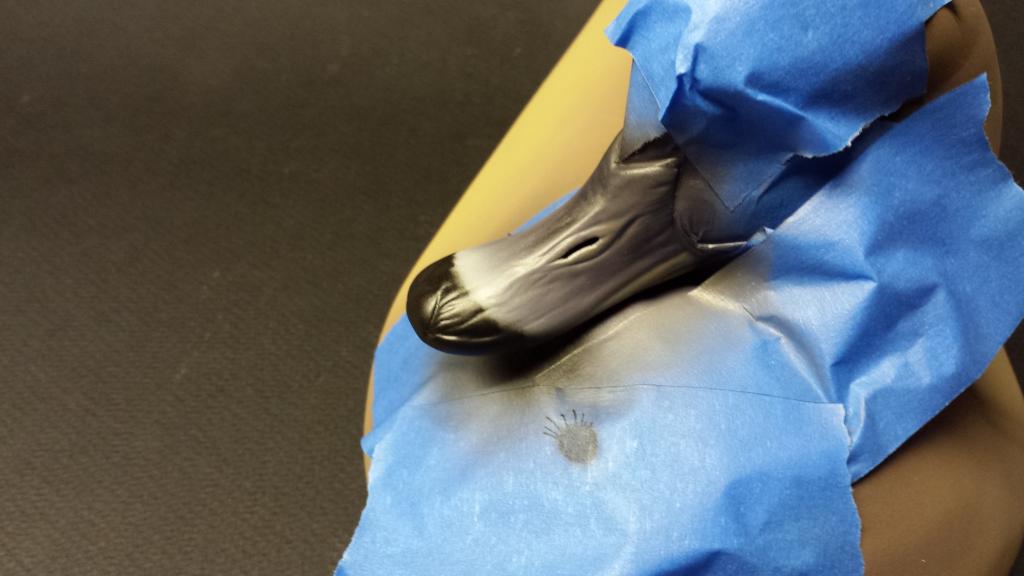
Its hard to show the detail work, my lighting isn't the best. But I used my 18/0 liner and added highlights to all the wrinkles. Pretty much 75% water and 25% color really wet. Remember that the dark areas of the bill will make any color pop..so you don't want to use too much white. I used same gray for the high lights. If it looks too white, tone it down with dark gray. Don't forget to color in the nostrils with black.
Before I use lacquer, I like to leave my cans out in the sun or in running hot water for about 10 minutes. Shake well, and spray light coats. Please do not rush this. If you overload, you can wrinkle the finish. Use the heat gun in between coats. 6 coats should do the trick. Satin finish on the bill. Use steel wool(#0000)in between coats if you get trash from your paint or gun.

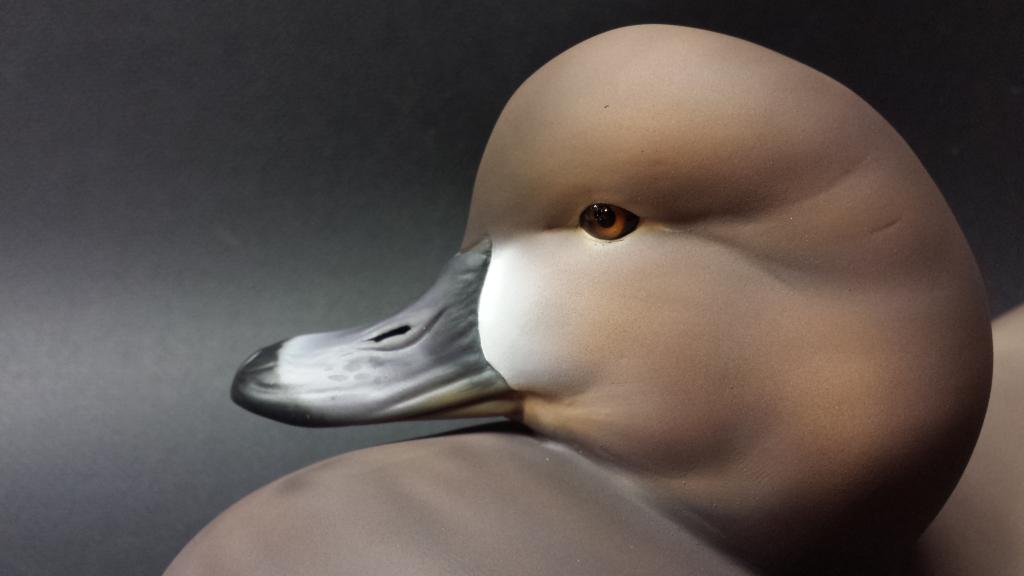
This is what it looks like. You can rub the bill with your fingers or micro fine towel to buff and get that finger nail sheen. Works great.
So today I will begin by masking the bill. I'm sure you will get over spray on the bill no matter how careful you are. But since the bill is covered with a lacquer finish, all you have to do is dip a clean brush in the airbrush cleaner and gently brush away the over spray.
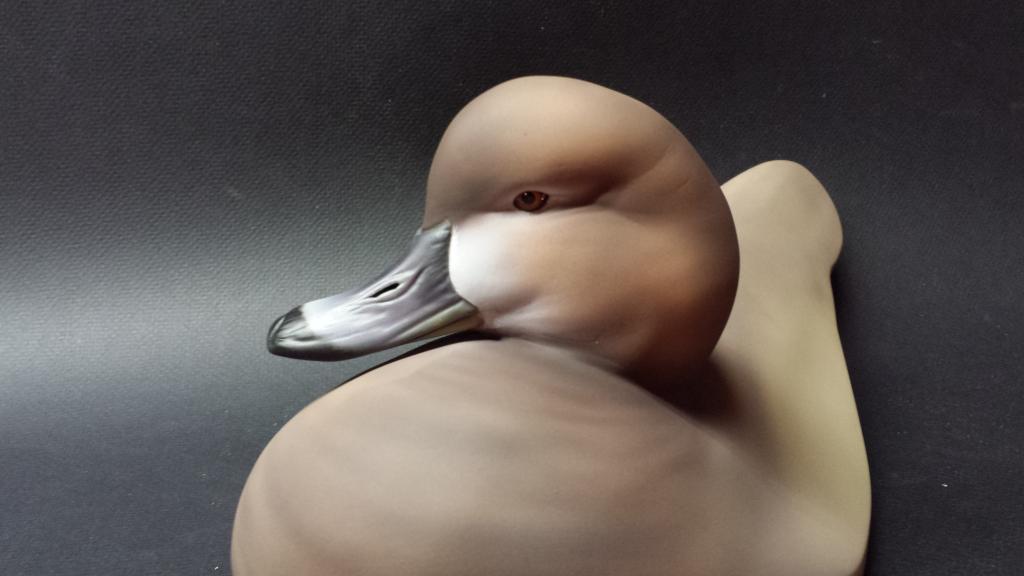
I spray unbleached titanium around the cheeks and eye. look at your reference to see where the lighted areas are. Some hens have a light head and some dark.
Now I mix up some burnt sienna and unbleached T. to warm up the head and spray around the light areas. Create a border. You want an orange tone, very very subtle though.
I will now add the dark areas.(Burnt Umber) Starting from behind the head, I add the smileys or zebra stripes and work towards the bill. I freehand these. This creates soft feather lines. When you get to the "V" of the bill, spray the entire forehead burnt umber
Now I add Titanium White right where the side of the bill meets the cheek. Since I'm painting wet creating a translucent color the white will become a warm white because the color underneath will break through and blend with the white. This is what I mean by layering your colors. Let the colors blend themselves . Notice how I added the dark shadows on the forehead and lower neck area. I define the muscles and create the fluffy look. When spraying the white, come back with burnt umber again and fade the overspray away.
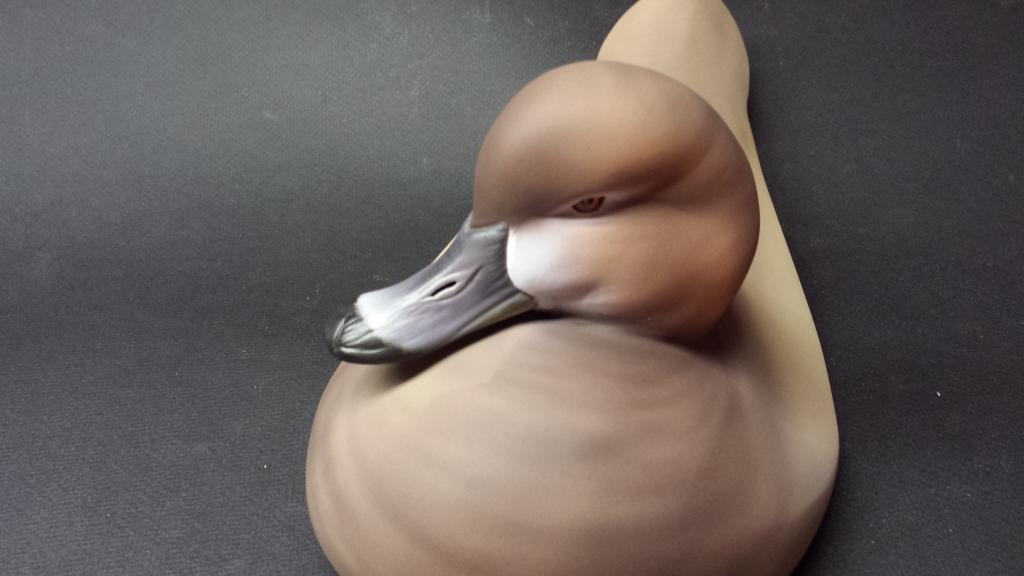
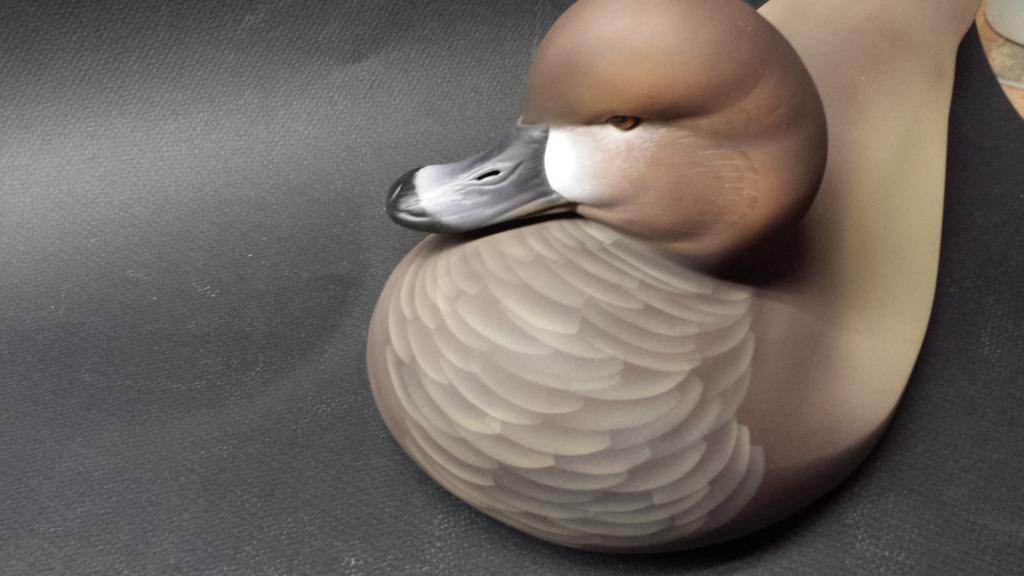
I cleaned the eyes to get an overall feel of the bird. I will now get into the detail. Bird looks really good, you can leave it as is or really define the head even more. When mixing paint and having a lot left in your gun...don't throw it away. Use it! Spray areas around the body, the breast area for example. Has darks and lights, don't waste paint.
Here's another shot. Not bad I think. The eye socket area has a definite light color around the eye. I like to add a high light right where the brow is(burnt sienna and raw sienna, just enough that you can tell it's a different tone. SUBTLE is key with all hens. I also added more brown to the breast area left over paint as I go.
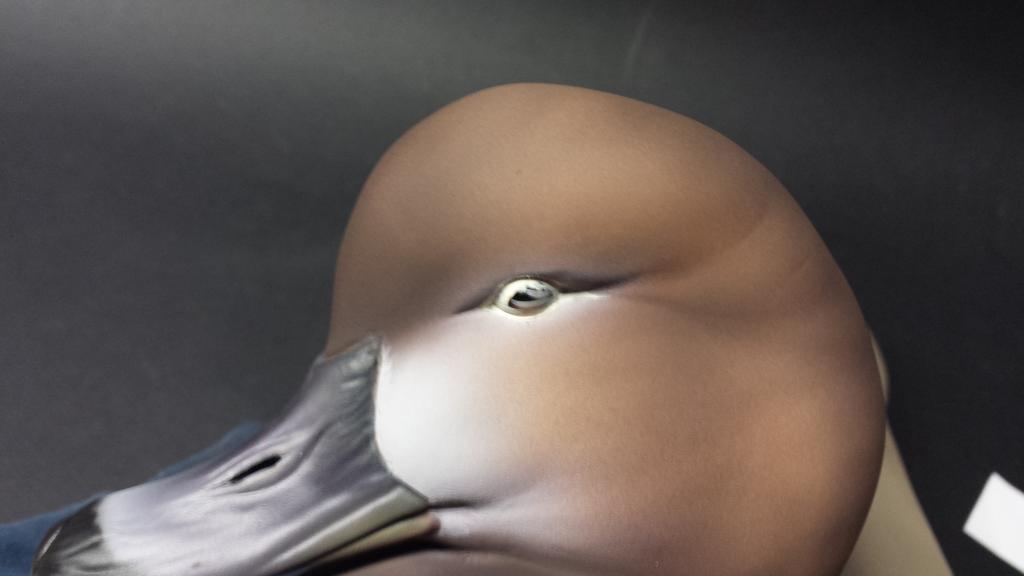
I started to detail the head a little bit and after staring at it...I'm going to add minimal detail. I begin by coloring the eye lid. I use unb. Titanium and color in the entire eye, making sure it's completely filled. Look at it from all angles...sometimes I think that I have covered the eye lids only to find out that i missed a spot. Then I airbrush the same color in the same area, feathering out, creating a nice subtle blend high lighting the area. You may get overspray but always come back with burnt umber and cover up.
Next I mask off the side of the bill again. I will shoot titanium white. I want that white little patch to pop against the dark bill. Note always spray away form your stencil. If you spray inward, you risk getting overspray underneath.
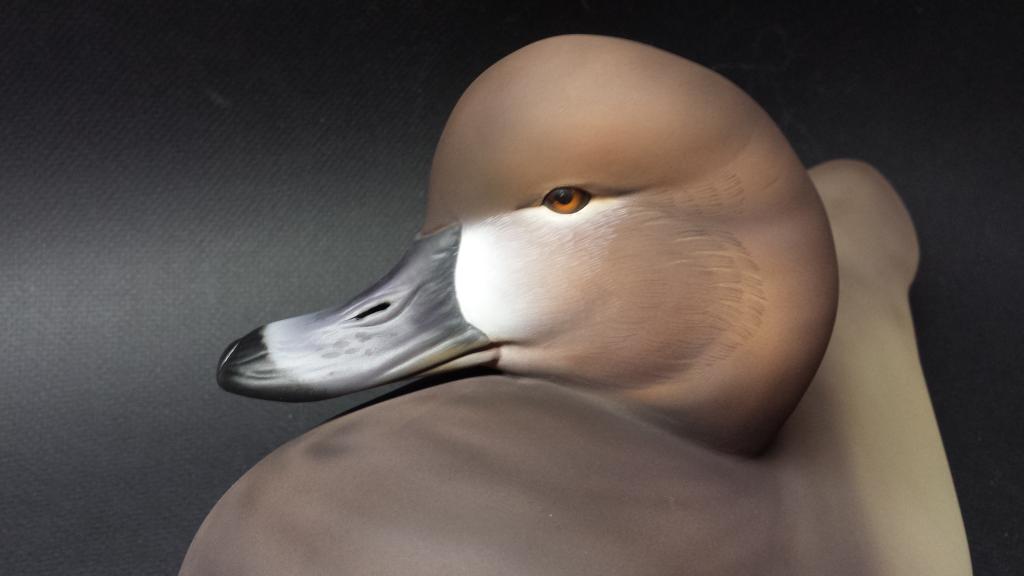
Here is what it looks like. From a distance, the spot pops.

I began to add some random feathers. I use burnt umber. Follow the colors and check your feather flow. You don't want feathers, all going one direction. This you will learn with time.

I add the splits with the base color of the cheek. I will spend time adding splits and high lights.

Same with the spot feather out. I come back with white and blend the feathers kind of making them solid, so that it doesn't look like a bunch of lines
another shot..
It will take time to fine detail the head. Clean the eyes, check for over spray add high lights, and shadows. You can just leave it as is..no feather detail, just smooth. Remember you can always fix a color that you don't like you can always spray a color on top of a color to cover up.
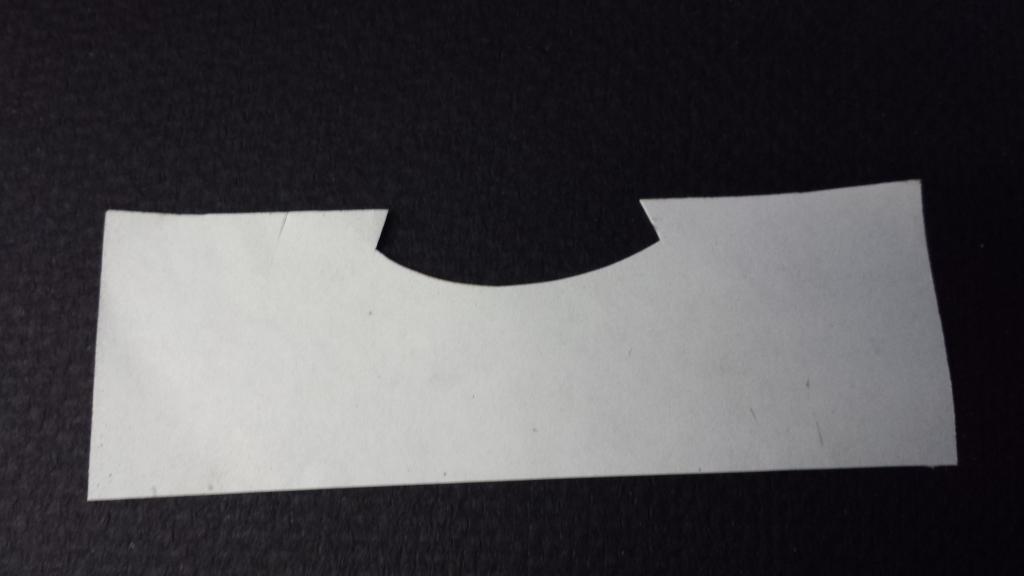
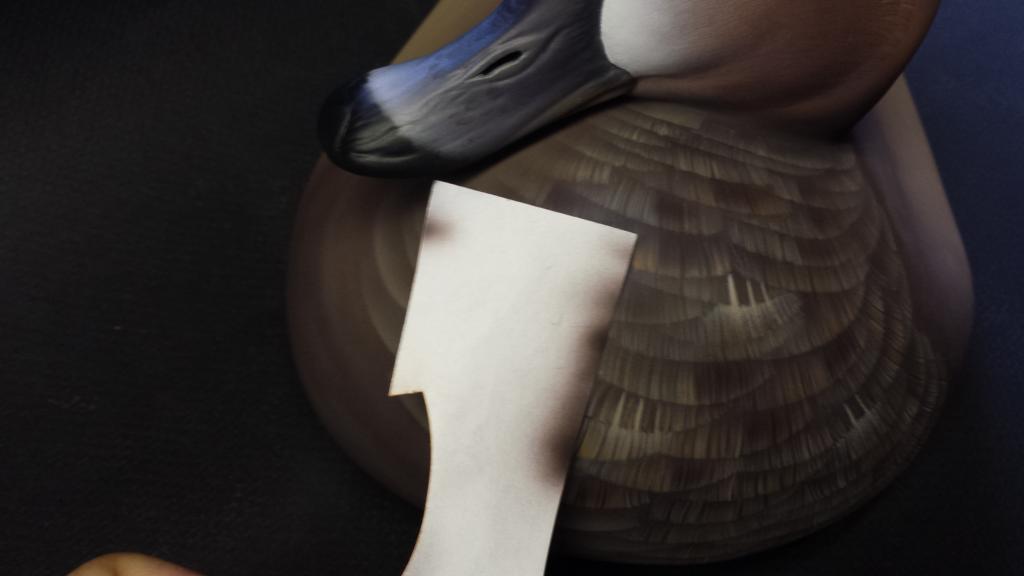
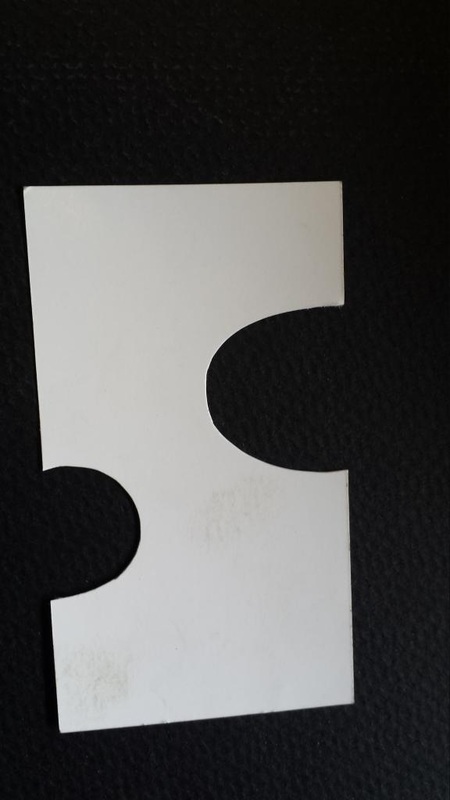
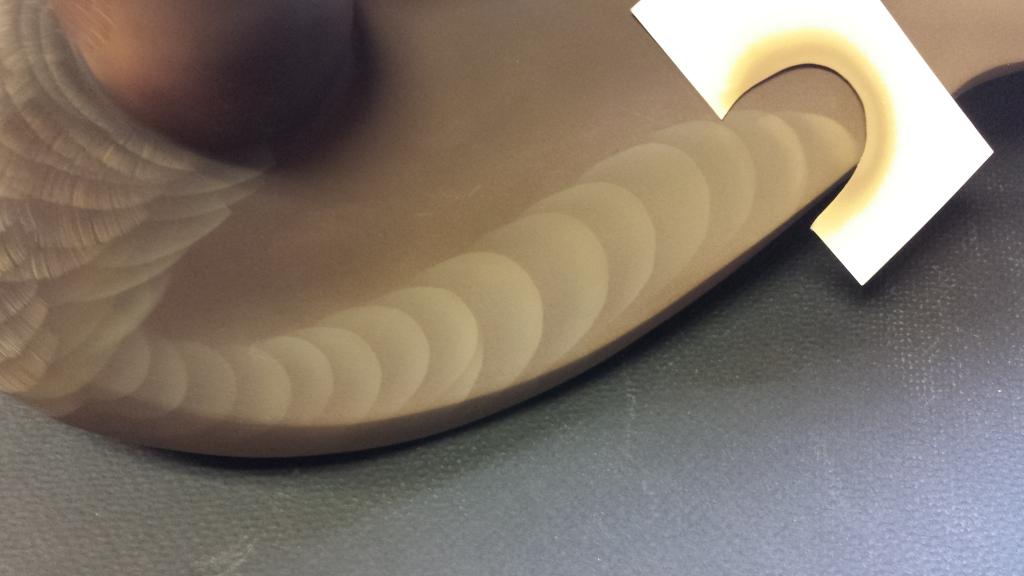
I will work on the breast. I cut out a stencil as shown. You can use a business card or an old photo. Something that can withstand the paint/ water.
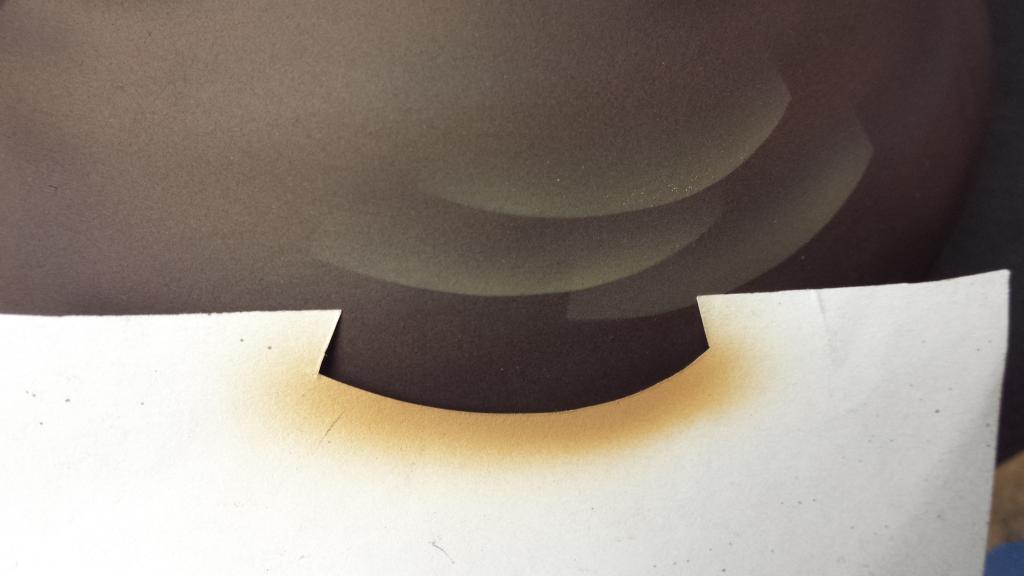
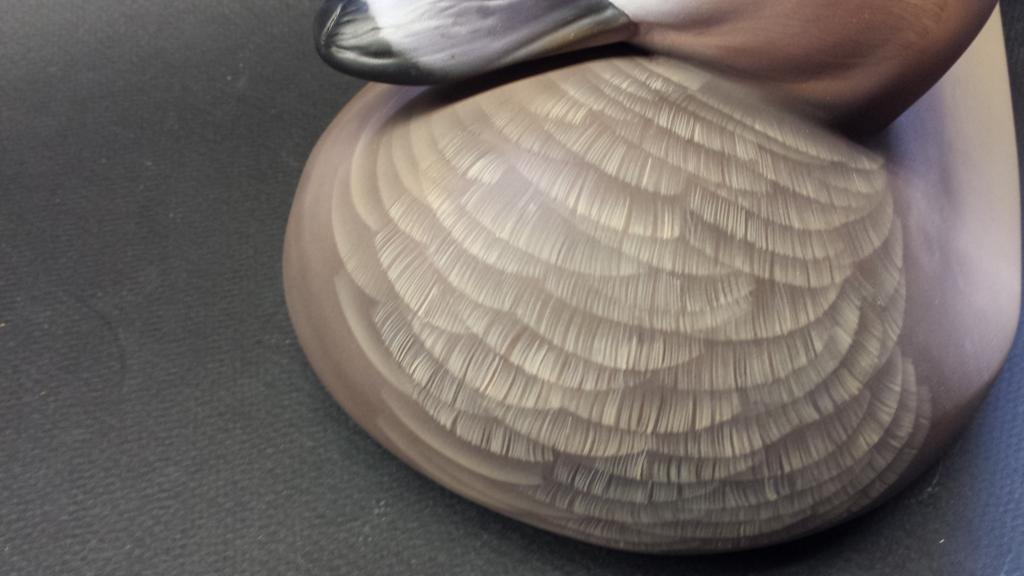
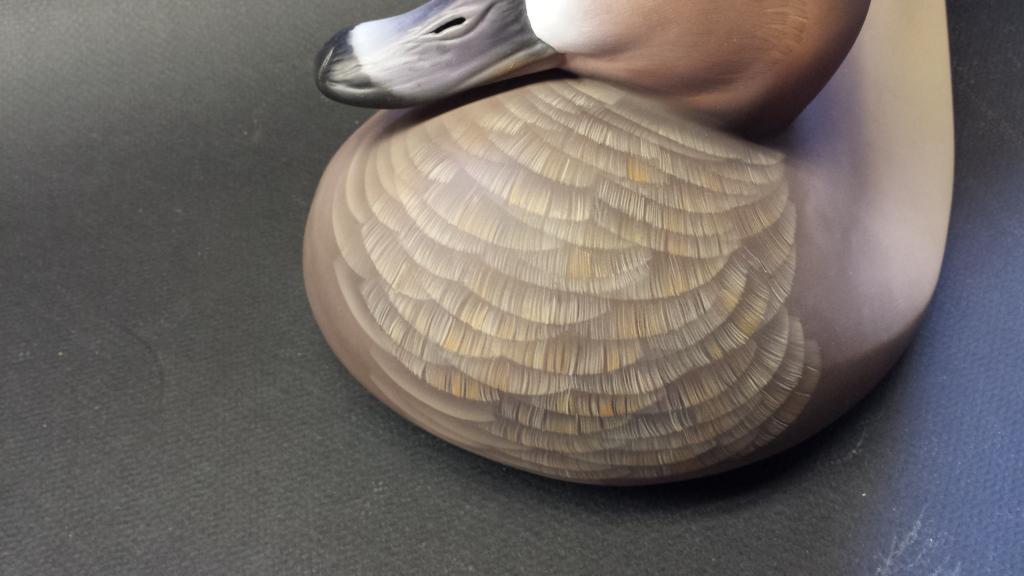
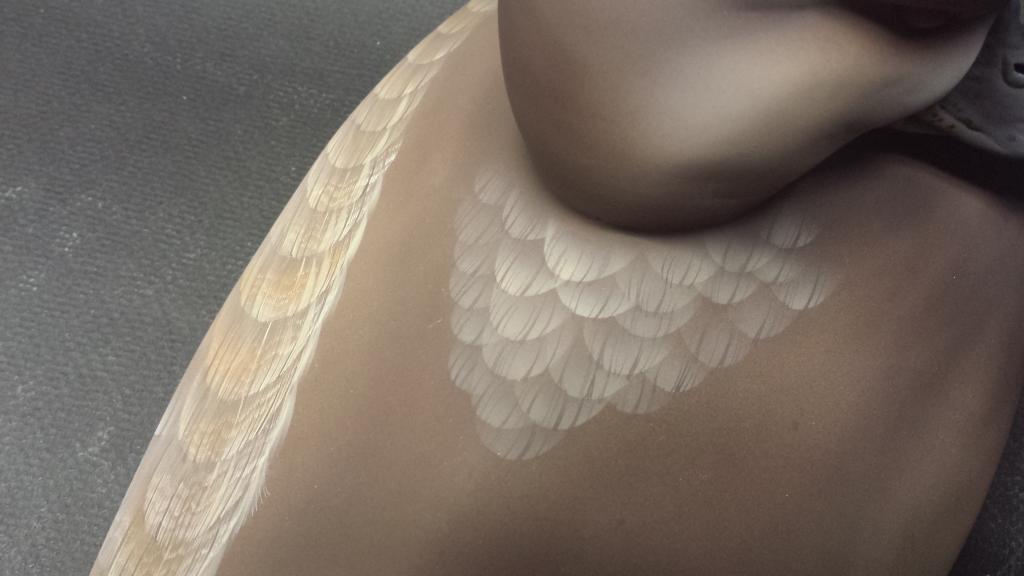
Here is a sample on how I sprayed the pattern. Work your way from top to bottom. In a low head position, the feathers are very tight around the neck and loosen up toward the bottom. I use raw sienna, with a touch of burnt sienna, unb. Titanium and burnt umber.
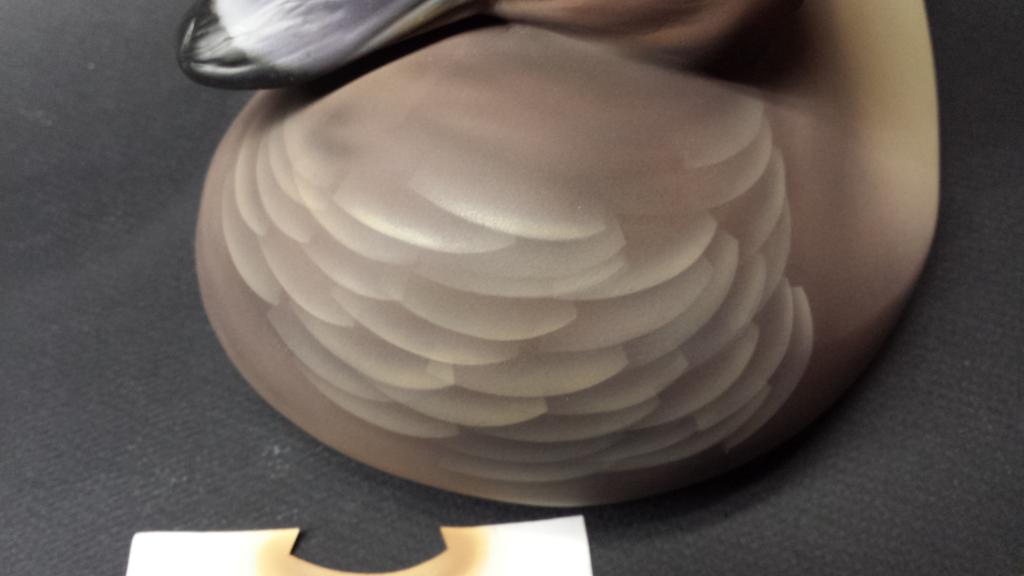
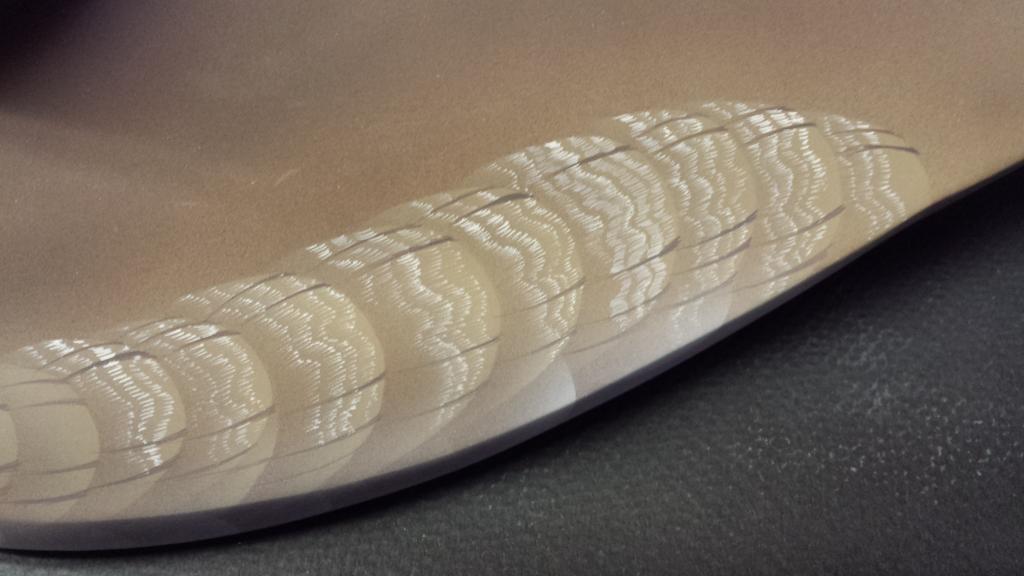
Move the feathers around. Create groups. The base coat of stenciled feathers is rough and dirty..overspray everywhere. But that's expected. You will define each and every single feather.
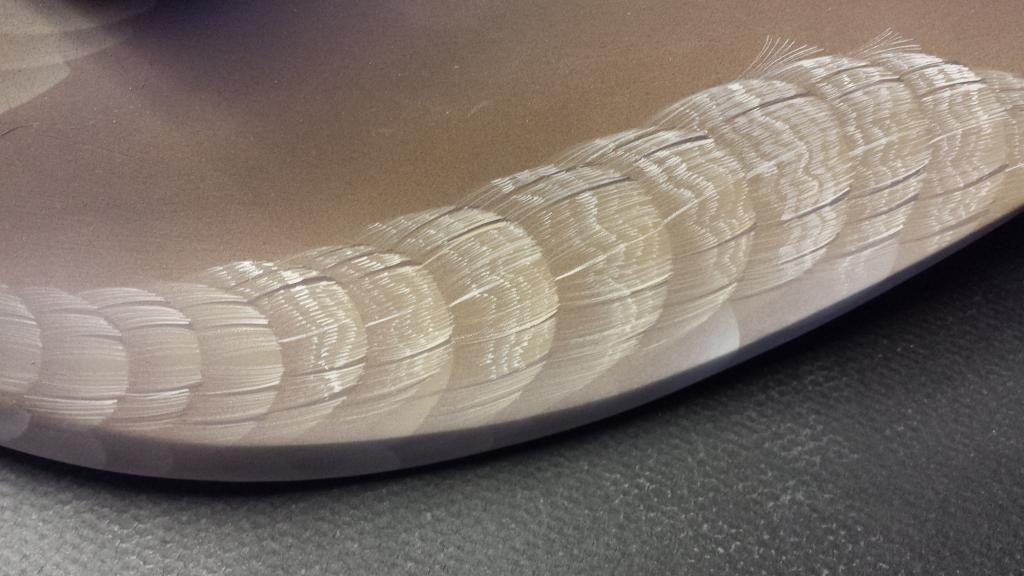
Another shot.
I begin to add the splits. The breast was previously base coated with burnt umber, you will use that same color for your splits. Looks messy right not to worry. You will clean up and sharpen each line with the lighter color used for the stencil work.

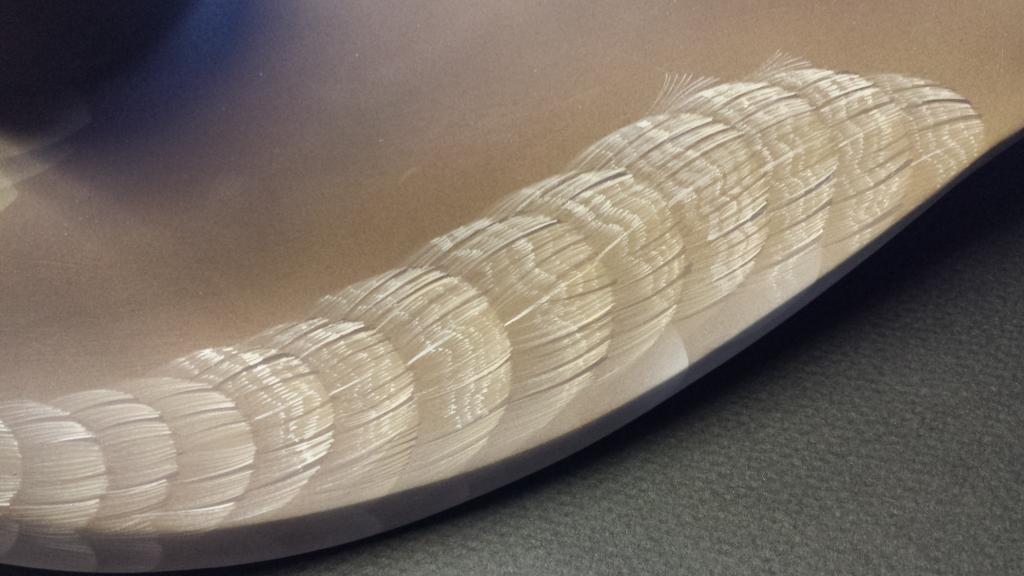
Another shot.
Which paintbrushes do you most often used for your finer detail work?
..I use either..10/0 or 18/0 liner. That's all I use. Feathers are layered out
with airbrush and detailed with liner. I free hand any transitions.
..I use either..10/0 or 18/0 liner. That's all I use. Feathers are layered out
with airbrush and detailed with liner. I free hand any transitions.
I begin with adding high lights to the breast feathers. I use unb. Titanium , Raw Sienna and a touch of burnt umber. I go through every feather that was stenciled in and clean up the previous splits. I flick each split from bottom edge of feather upward. I do a group of lines and leave a gap then a group of lines and then a gap. Creating feather gaps, which makes the feather look fluffy.
Same process, only I add Raw Sienna and Burnt Sienna. It's amazing how you can add these two colors to burnt umber and make that color really rich and alive. Just do random splits through out.

I underpaint some feathers. Using unb. Titanium. Makes the breast feathers more believable. Fools the eye.
Here's a little trick. I do this to all feathers. I get my stencil and I cover half the feather and I spray burnt umber. If you look at a feather in the sun, you see half of it shinny and other half matte/flat. I create this by spraying half, change stencil back and forth. You don't want all the halves cut the same way. Do some on the left side of feather and some on the right

Starting to come together.
Another trick that I do, is I get carbon black and use 18/0 Liner. I go through and add sharp super thin splits through out. You clean up any imperfections as well while doing this. It also makes it look like the bird was burned. I will post more as I go.
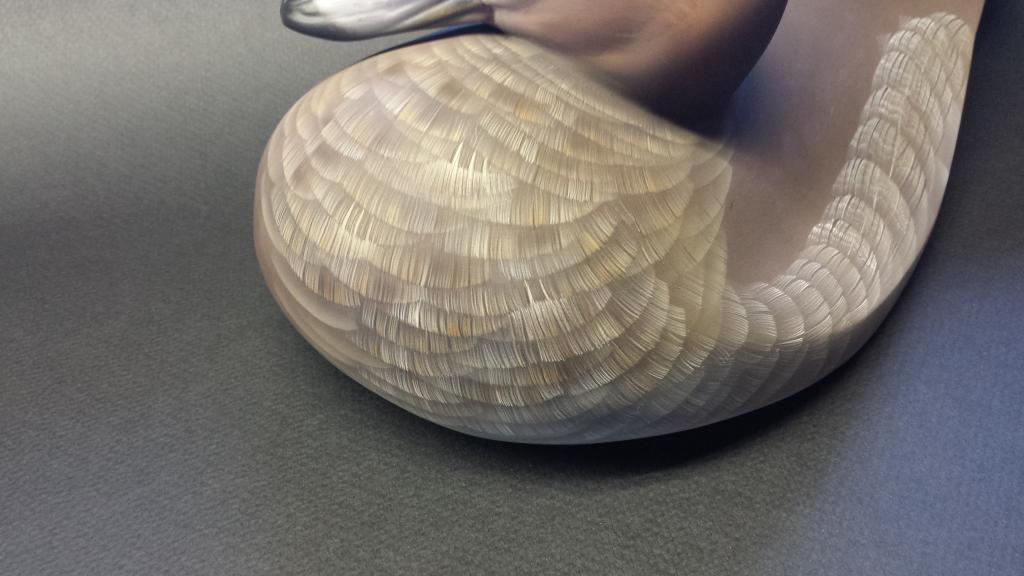
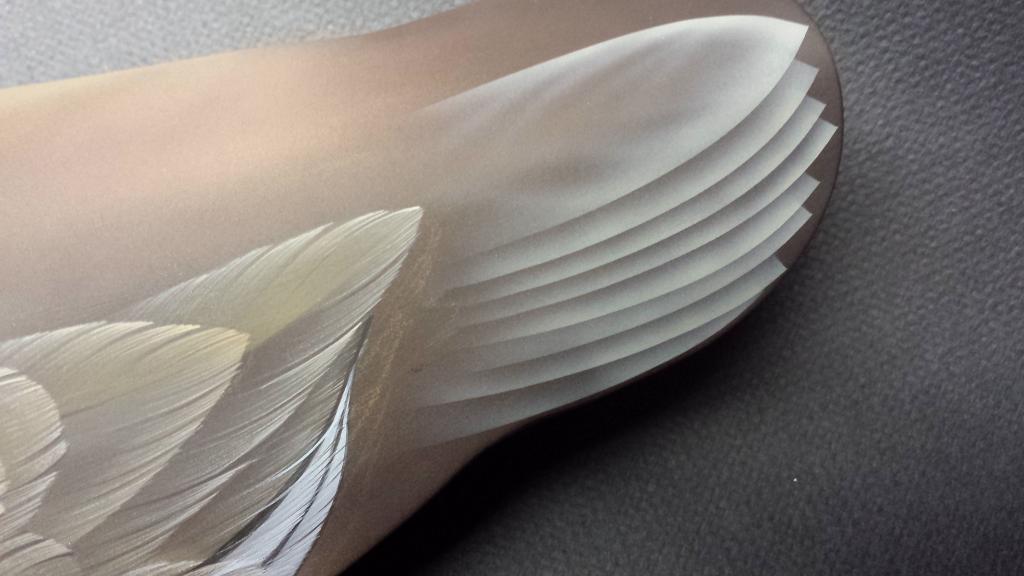
Ok, I cut out a stencil for the side pocket. I use 3 different sizes.
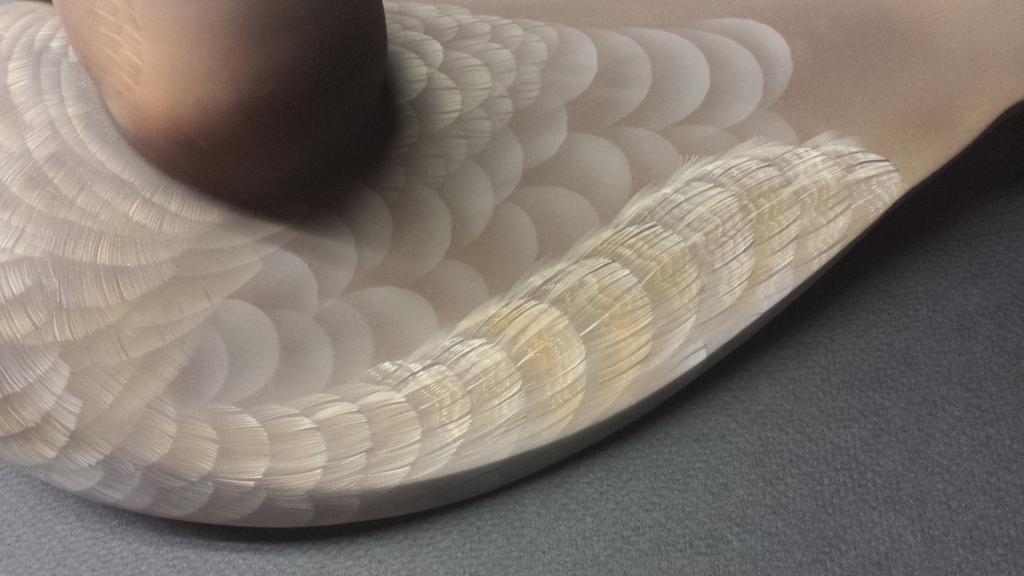
As I begin from the breast area, the side pocket feathers get bigger towards the tail. Check your reference on feather layout. I use same color as breast feathers.

Another view.

I start to add feather splits with burnt umber and unbleached titanium.

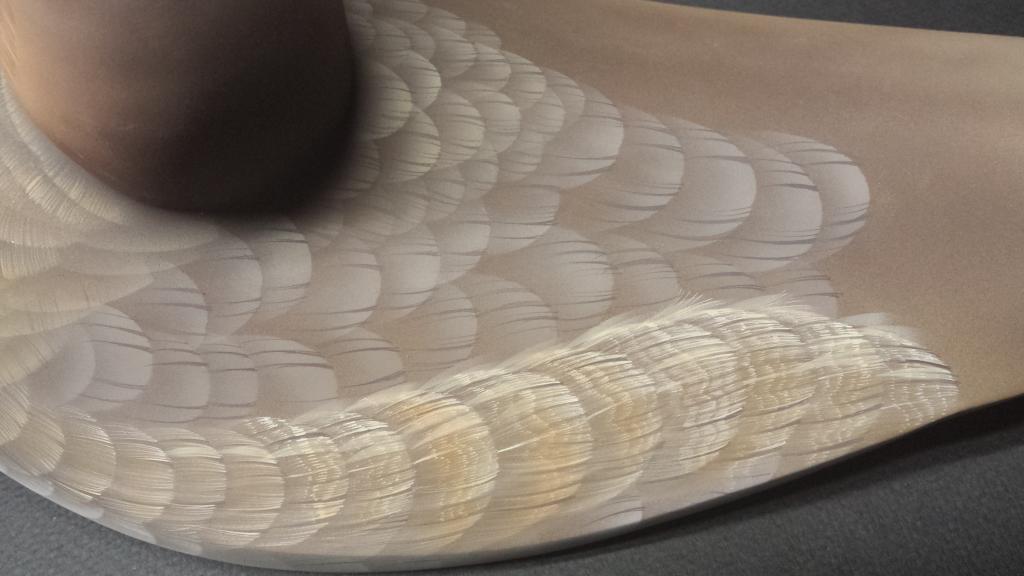
I spray Titanium white on the bottom of side pocket and bottom of breast.
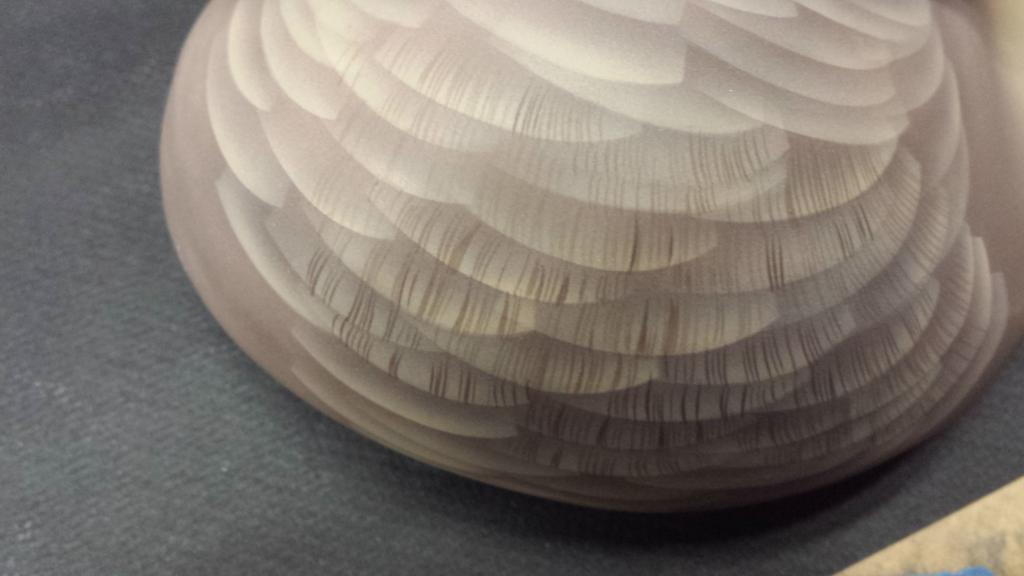
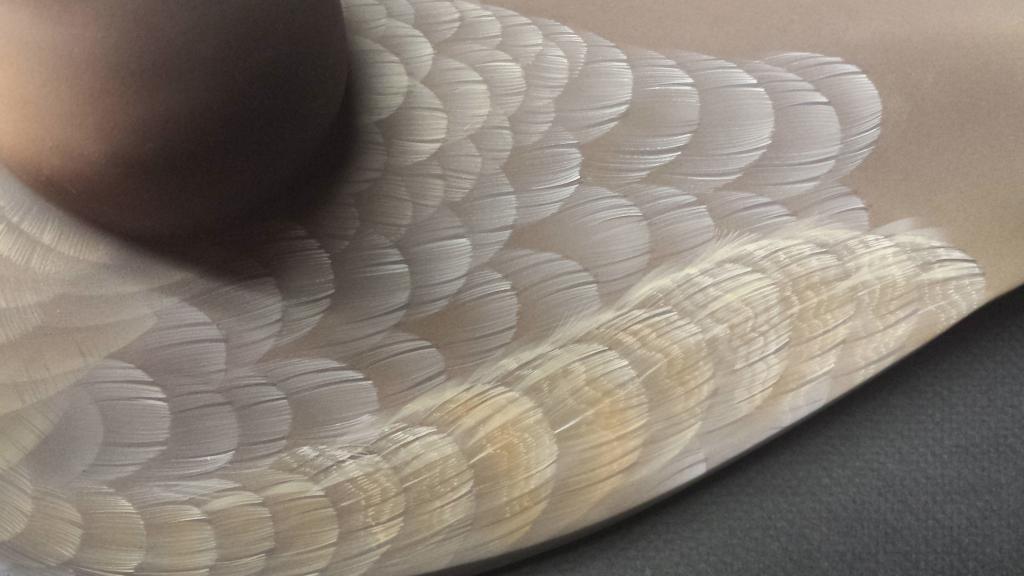
Now I start the vermiculation. The feather is not fully covered with the vermiculation, more towards the edge of the feather. I use my 18/0 liner and begin to add the tiny lines. Always follow the split lines or burn lines for a decorative. The tiny vermiculation lines should be parallel to the split and burn lines. You will spend hours painting these tiny lines. Or you can comb in the lines and skip this step.
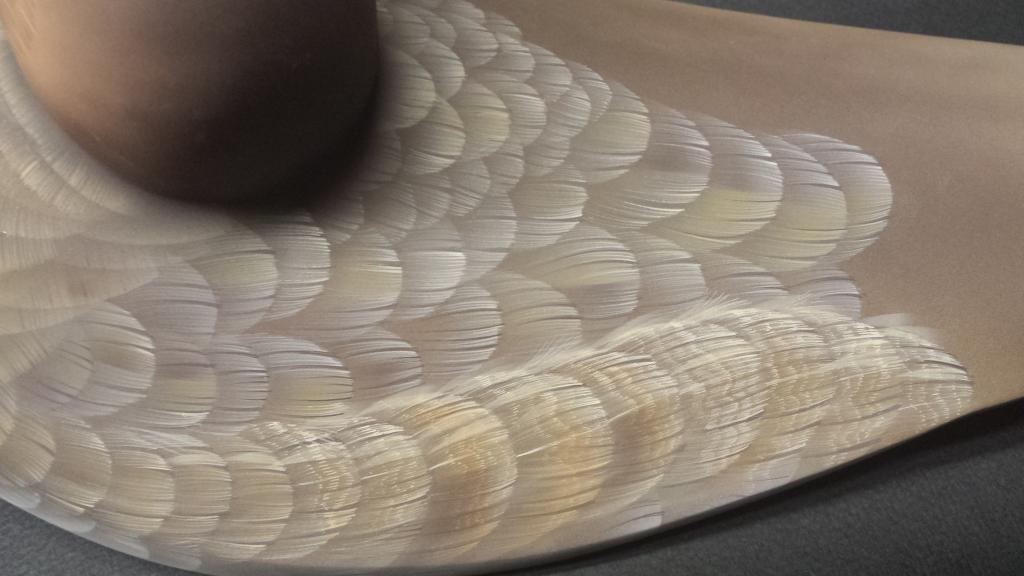
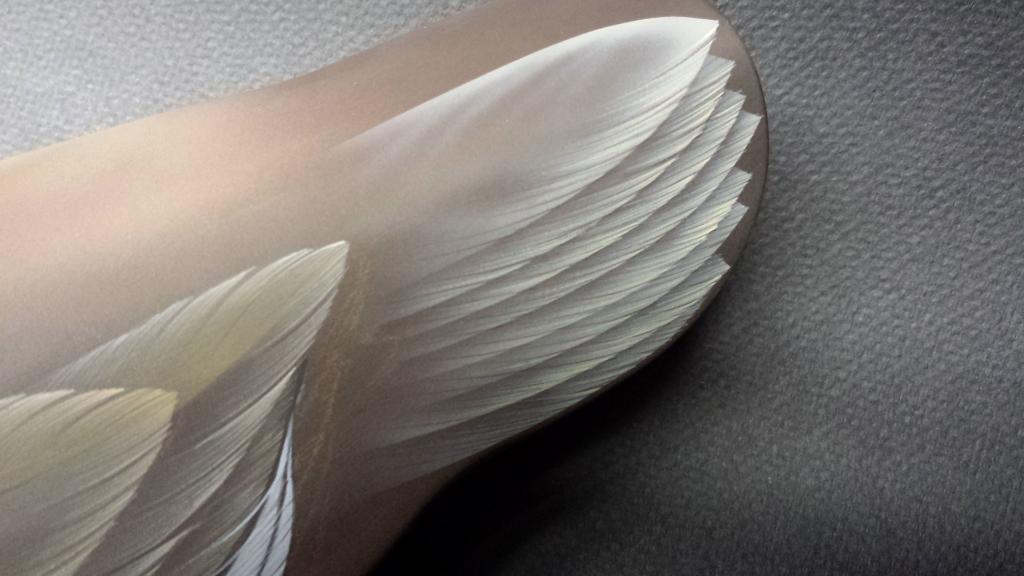
I start to detail the side pocket. I begin to add the high lights with lines, breaking up the vermiculation just a little more . I start from the outer edge of the feather and flick inwards.
Another shot.
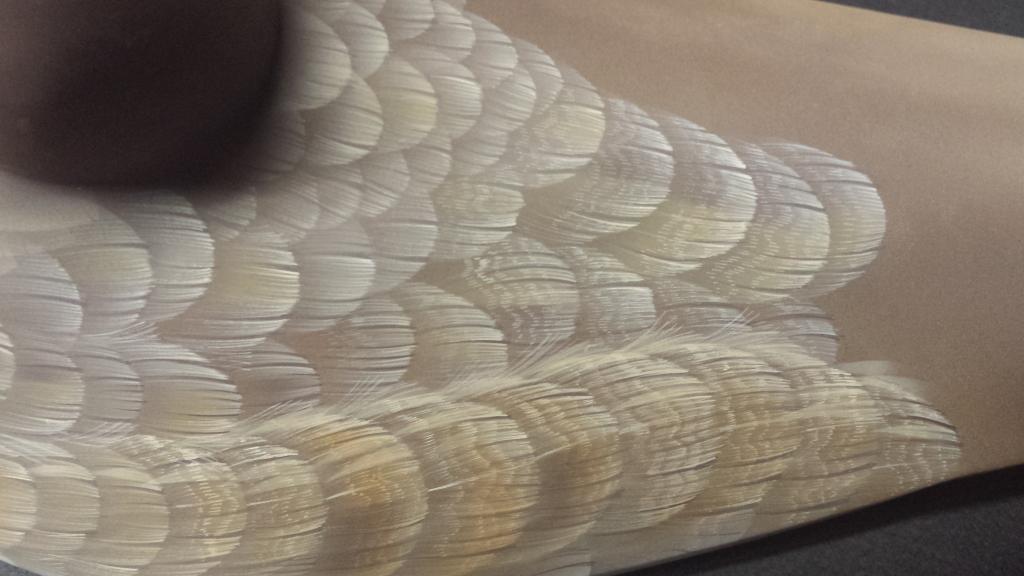
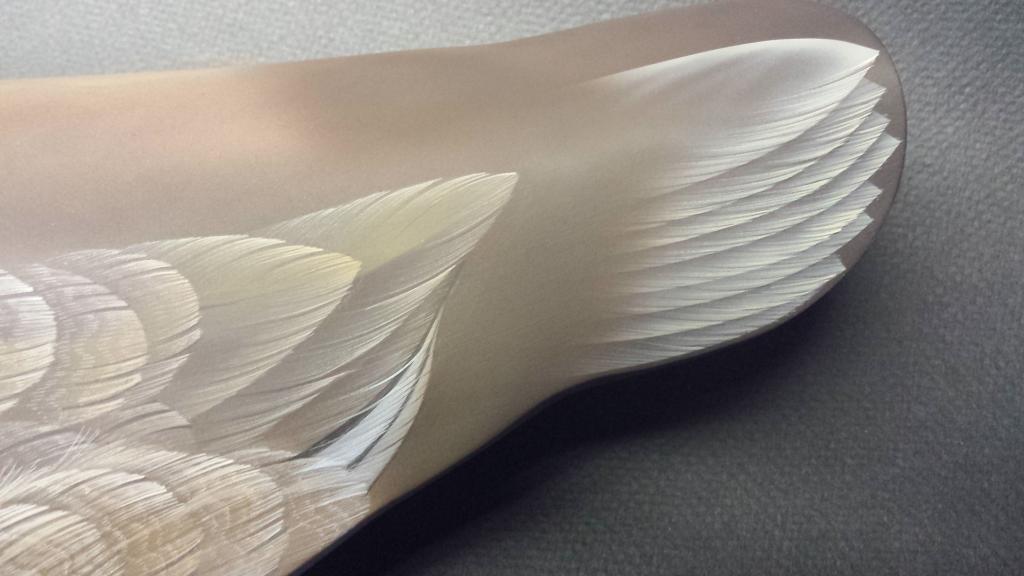
I use the same color and add some to every feather, working my way from the side pocket towards the breast.
When using the airbrush do you have to throughly clean it every time you switch
colors? That ticking and feather detail seams very tedious.
since i water down my paints, i use the paint cleaner or even a spray bottle of
Windex and spray clean the paint cup on your gun. I really don't do a thorough
cleaning only when I use white, then I make sure it's pretty clean. Paint
cleans pretty easy when watered down. If your paints are thick, it might take a
few tries to really get the color out of the gun

I begin to work on the back. I cut out a stencil for the smaller feathers behind the head. Check your pattern and group the feathers accordingly. I use unbleached titanium and burnt umber. The back side of the hen is going to be the darkest area.
I now add the splits.
I continue with the larger feathers
I add the splits. When you do the splits, follow the shape of the feather. Start from the outer edge and flick inwards. Our splits should be curved, not straight.
I add high lights or light colored splits.
Notice how I split the feathers and painted half raw sienna and other burnt umber. Subtle tones.
I added some vermiculation.
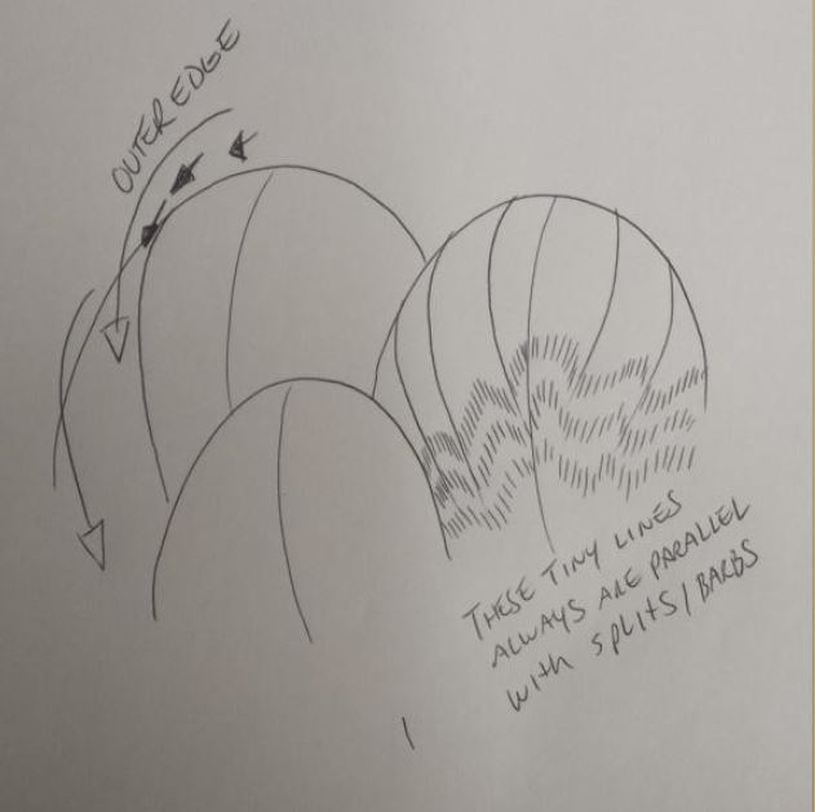
I did a little sketch on how you're supposed to do your splits. You should always follow the outer edge of your feather and flick our brush inward as shown with the little arrows. So all the lines will follow your splits. Always curve our lines/ You don't want your feathers looking like pine trees. Do this step when you're burning your feathers as well. Burn at a low temp and sharpen your blade. I use 320 grit sand paper. They say you're not supposed to sand/sharpen your blade that way, but I do. On the vermiculation, the tiny lines always follow your splits. They will always be parallel. One out of place line, will ruin the rotation. I use my 10/0 or 18/0 liner and mix my paints with a lot of water or flow medium if you prefer that. Swipe your brush before applying paint. You want super thin lines and a slick point on your brush. Too much paint will result in thick lines or a blob of paint. Hope this helps a little. More to come
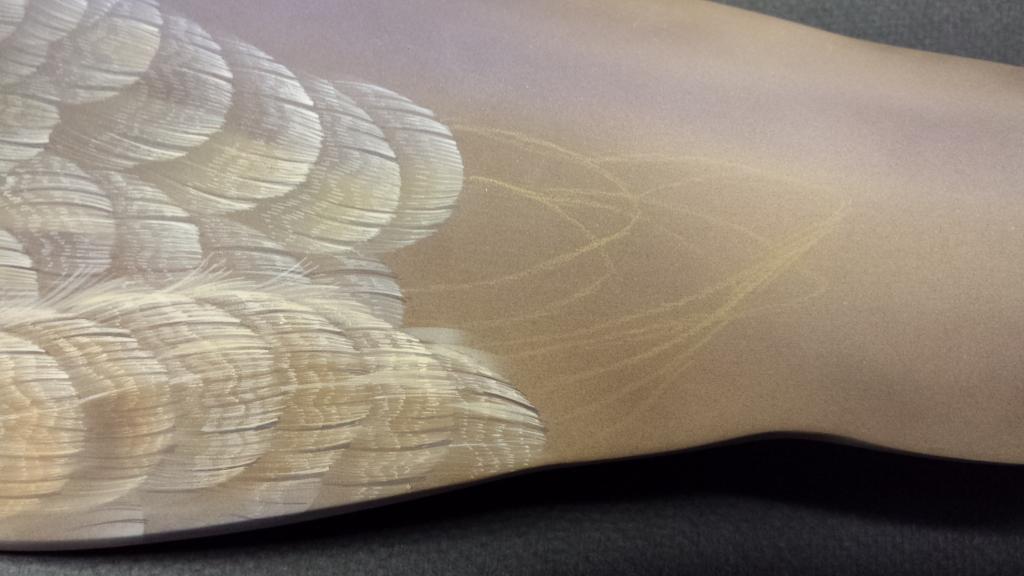
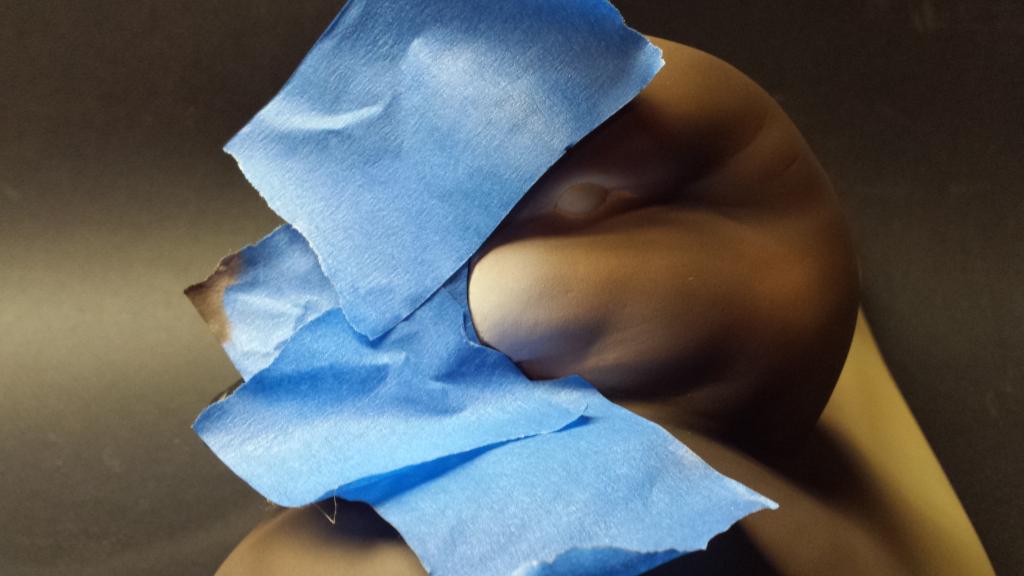
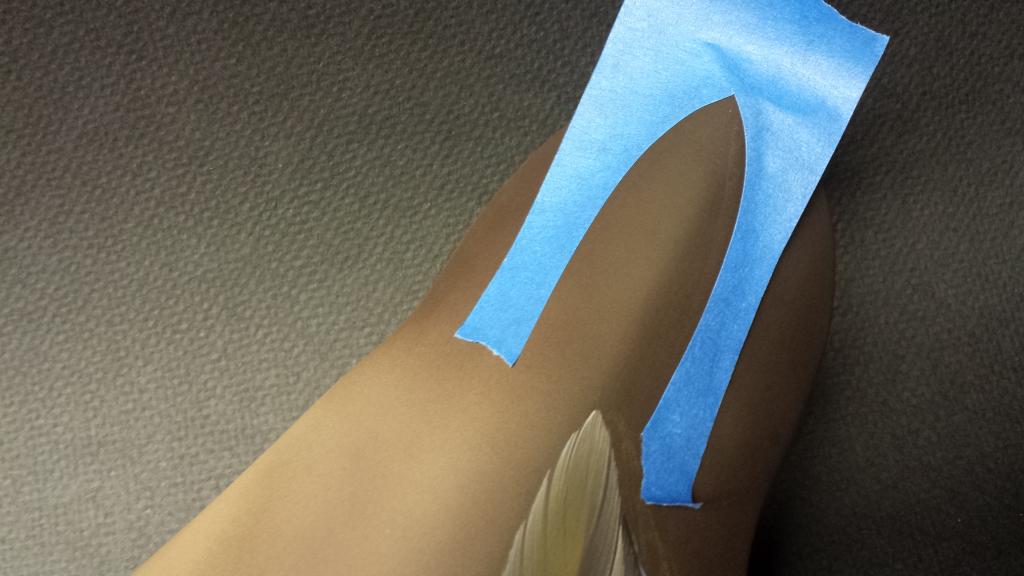
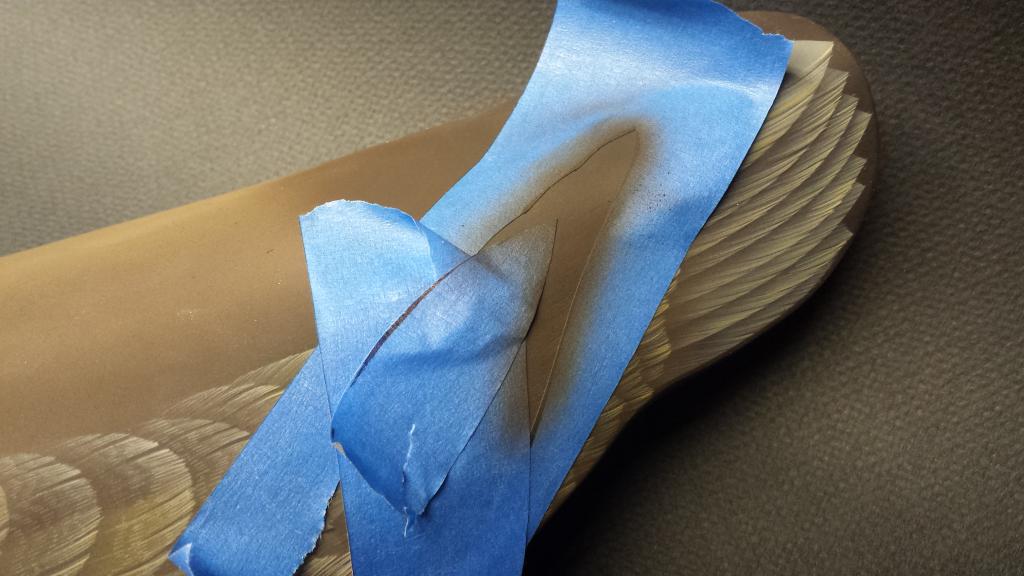
Today I started to work on the tertials and speculum. I used a Prisma colored pencil to outline the feathers in place and then I'll lay the stencil in place.
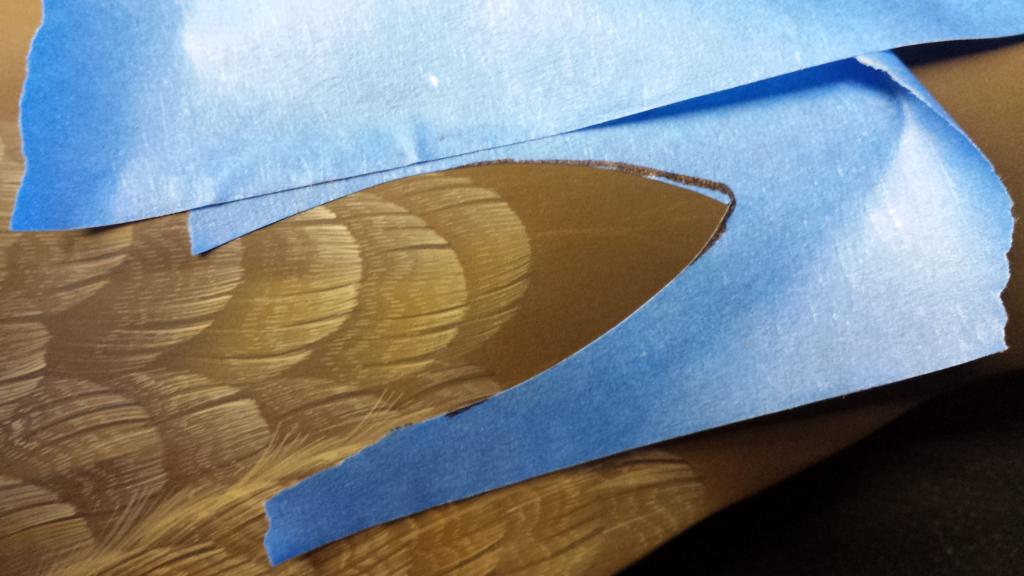
I used blue 3M painters tape for my stencil.

I follow with the second feather.
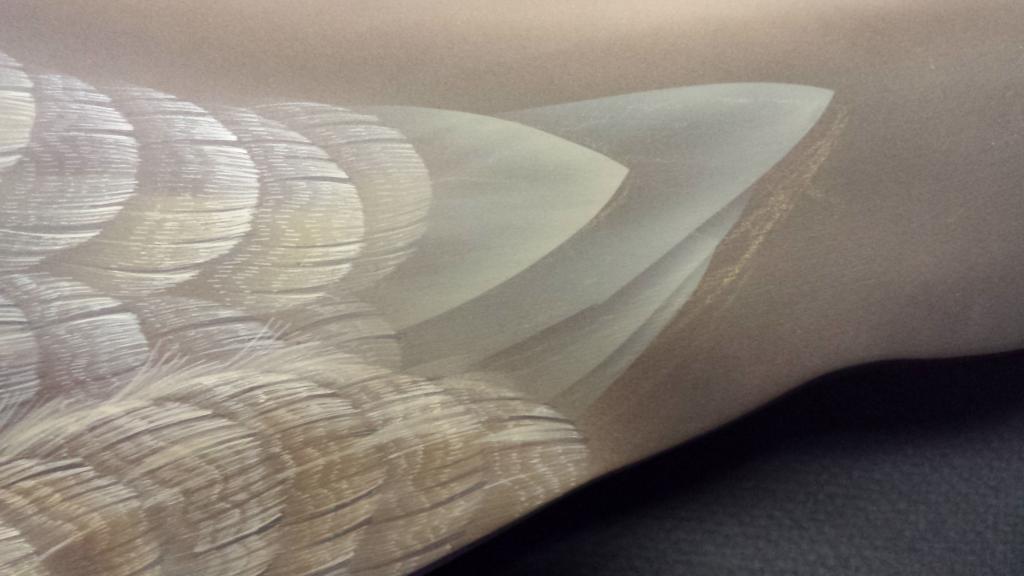
Here's what it looks like. I use the same stencil, so don't throw it away. Note, palm fronds are long in shape. it takes time to get used to this shape, kind of looks funny when feathers are laid out. But that's the name of the game in frond world.

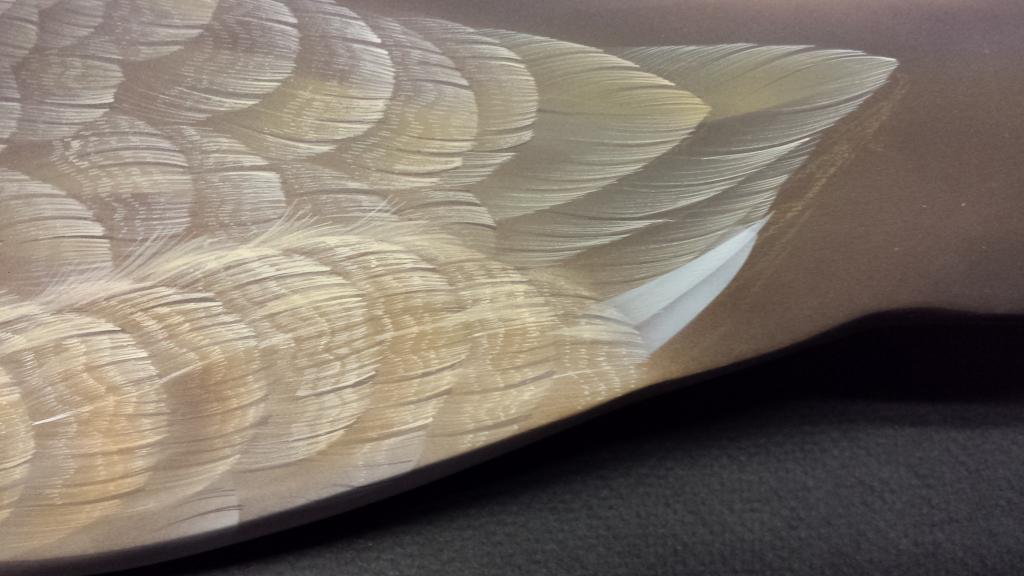
I added some splits and high lights, same technique as side and top feathers.
Same with the speculum. I used nymbus gray and cobalt blue.
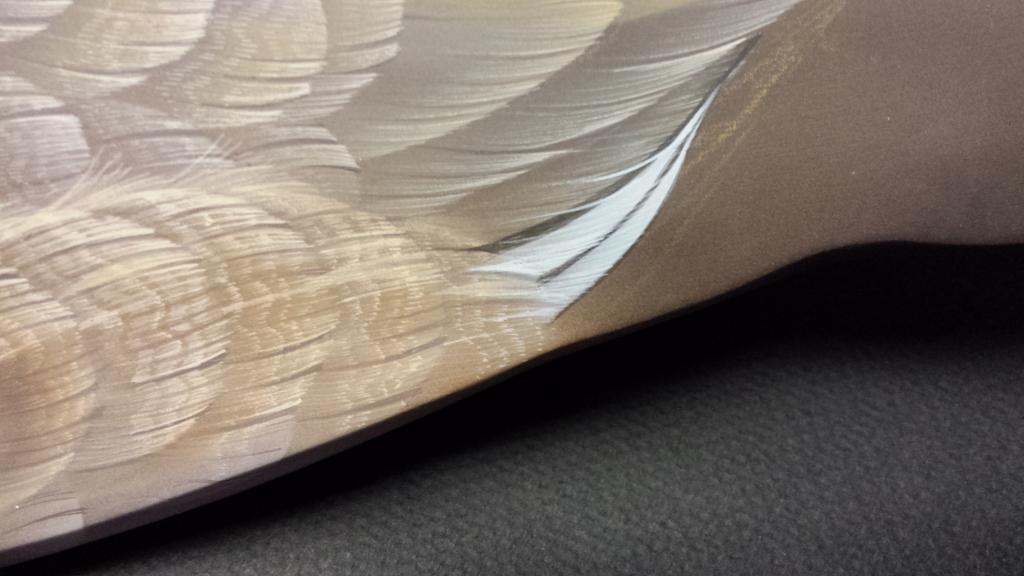
I cleaned up the feathers and added a black edge on them.
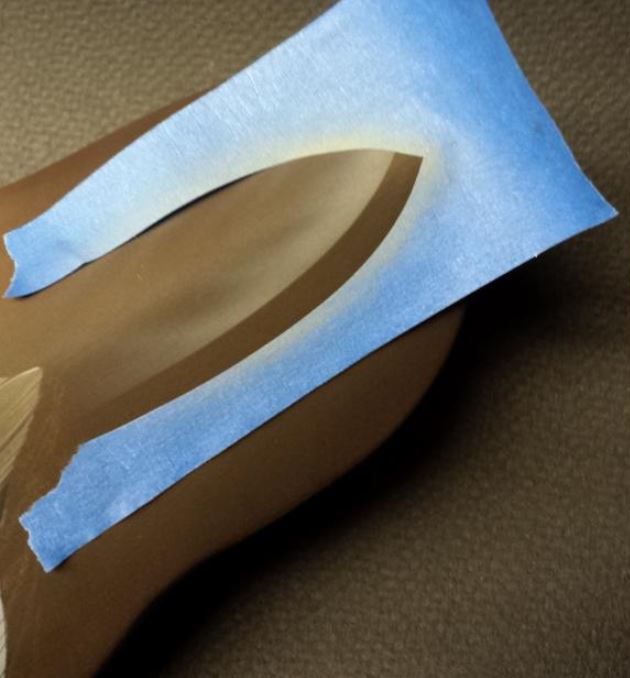
And now for the tail feathers. Cut a stencil out and use for all tail feathers.
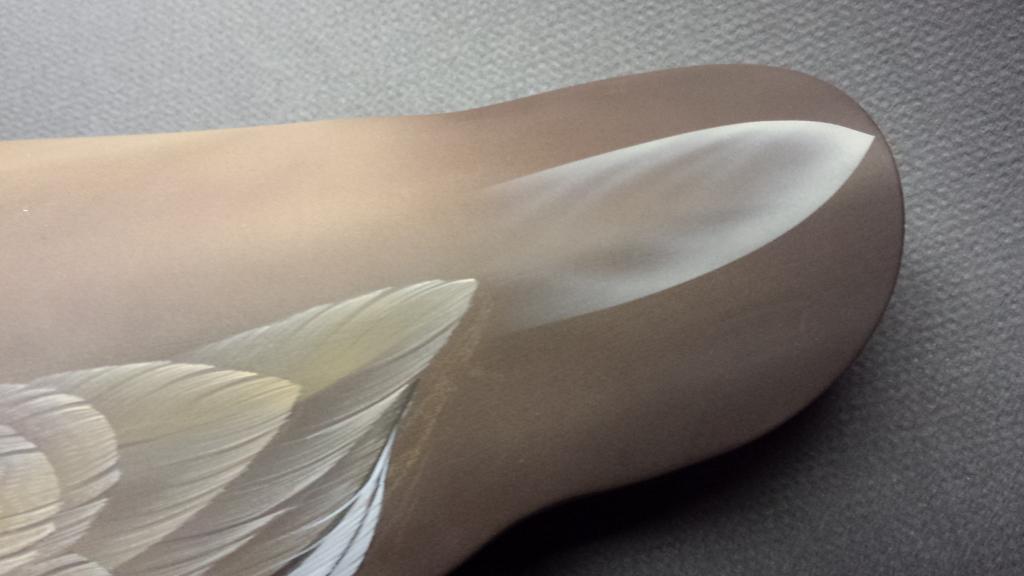
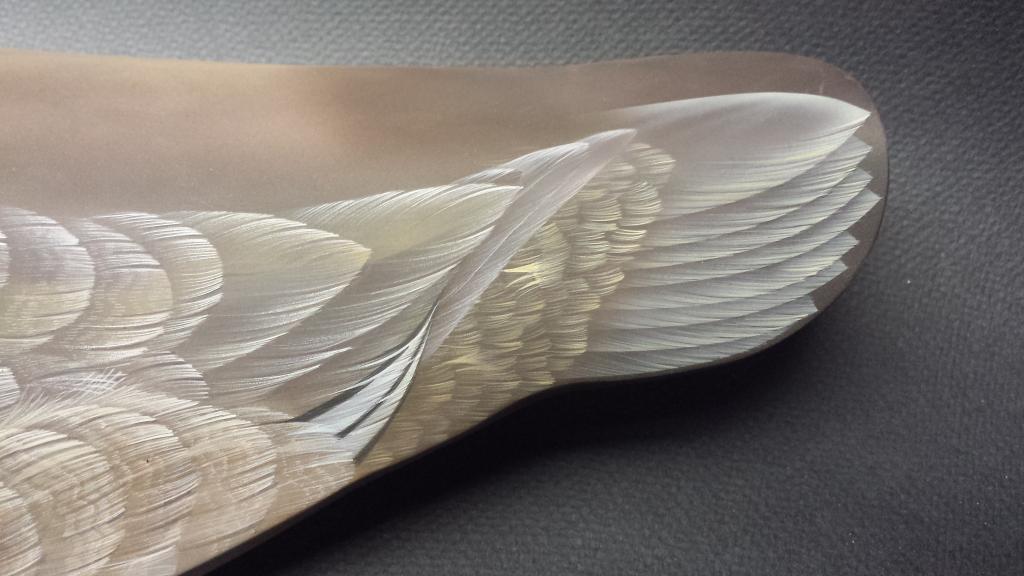
Always start with center feather and rest will follow. Unbleached titanium and raw sienna. Notice how I free hand some high light lines, creates a soft look. I always start with tail feathers, so that I can lay coverts on top. They look long, and they are, but they will be shorten.
Check your feather pattern layout and adjust each stencil, creating a stair affect. I only airbrush the outer edge of the stencil. I try not to airbrush on the existing feather. You cut mask it if you feel more comfortable.
Tail feathers on a redhead are short and wide. about half of the tail feathers that just demonstrated will be covered with the tail coverts.
Splits are added.
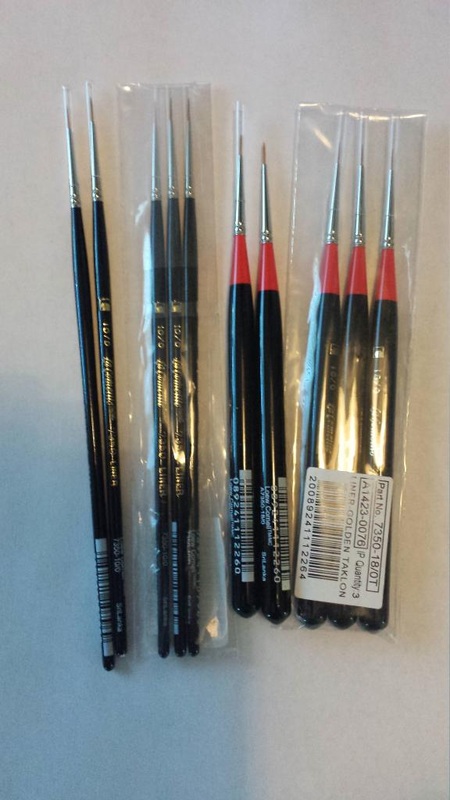
Got some goodies in the mail today. 10/0 and 18/0 liners.
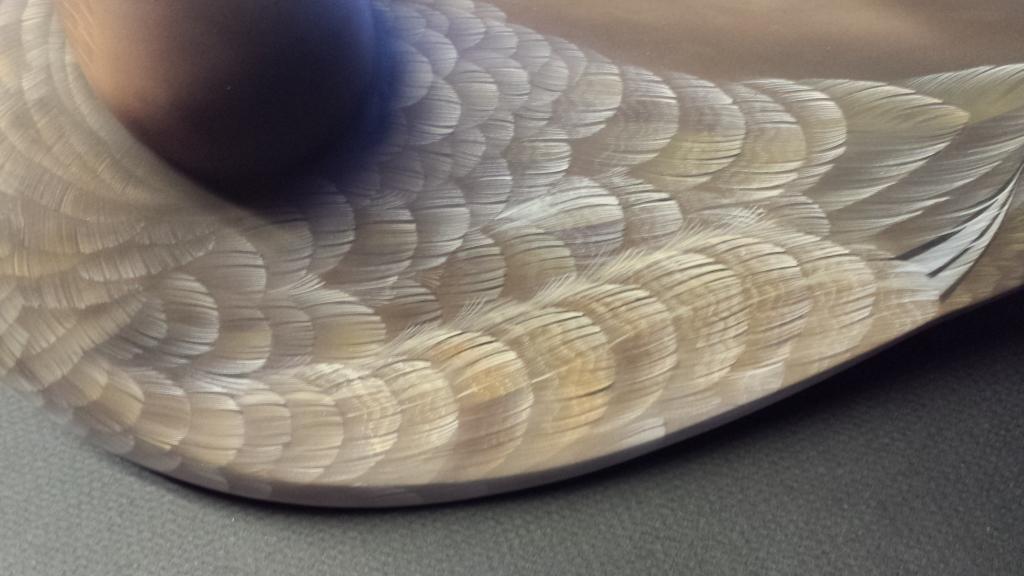
Today I started to work on the tail coverts. I sprayed burnt umber over the tail feathers, making them shorter.

I started to freehand the tail coverts. NO AIRBRUSH this time. Working from the tail down.
Your always want to do the coverts first and then the primaries on top.
Starting to take shape. I added high lights to the primaries. I sprayed the outer edge of each feather. I will go back and clean up and add more high lights.
This tutorial will soon come to end. The next post should cover everything.

Ok guys, my final step is basic and it's something that you should already be doing. Touch up! I spend a fair amount of time doing this. I check every inch. Clean your lines, add highlights, check for areas that will be most seen by judges, clean the eyes. Stand back and stare at it. Have someone else look at your piece, especially another artist. After a while everything looks the same, and mistakes will not be seen anymore, because of fatigue...well that goes for me.
When all the touch up has been done and you're satisfied with your bird, i spray a dead flat or Satin finish lacquer. This gives a even sheen and clear lacquer makes all those colors pop like you wouldn't believe. When dry, i then go through some of the feathers, especially top feathers, and i use an illustration marker and do some splits on half of random feathers. When looked at with glare from lights...it gives it that two tone look like real feathers have.It leaves a gloss finish, so they stand out when using a dead flat finish.
Just wanted to thank all of you for checking out my little tutorial. I know that only so much can be learned, when not demonstrated live. I hope you learned a little from this. There are no secrets here!!! The biggest kept secret is one that everyone knows or should know, and that is to "PRACTICE!"
Airbrushing is not easy. It is learned with patience and practice. Study your colors, study your birds, study everything and learn from others. I taught myself how to use an airbrush and the internet wasn't around 25 years ago. Today, everything can be learned. Do you feel that airbrushing is not "FINE ART"? Remember, "You can teach someone how to draw and paint,and you can even teach art it self, but you can never teach someone creativity!" Be creative and practice everyday. Thanks everyone, Mr.Feathers

0/0 can pretty do what a 18/0 does. The 10/0 will hold more paint, but if you
don't thin down your paint it won't do you any good to use either of them. 18/0
holds very little paint, and you want that to get super thin hair line results.
You never want to over load your brush. I thin it down so much that it looks
like it's water, very transparent. But once you paint on top of a darker color,
that color will pop. I don't use any formulas or write down how much paint I
used to create a color. I paint what I see. This hen is very monochromatic. I
only use Burnt Umber, Titanium White, Unbleached Tiatanium,Raw sienna, Very
little Burnt Sienna and a little black. I was able to get a minimum of 40 tones
of browns with just these colors. I mixed them around on top of each other.