
2014 Pacific Flyway Painting Demo
Redhead Hen
By
Daniel " Feathers " Montano
Thanks to Daniel and Tom for letting me post the Demo .
Redhead Hen
By
Daniel " Feathers " Montano
Thanks to Daniel and Tom for letting me post the Demo .
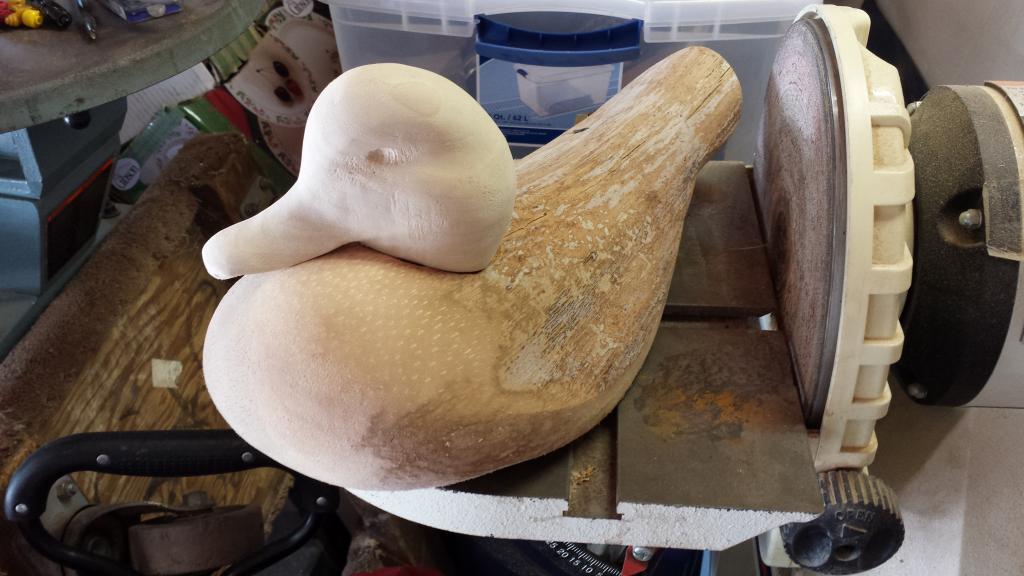
I"ll be posting pictures of this Redhead hen frond, getting it ready for the painting demo I will be presenting. Airbrushing feather samples. Feathers'

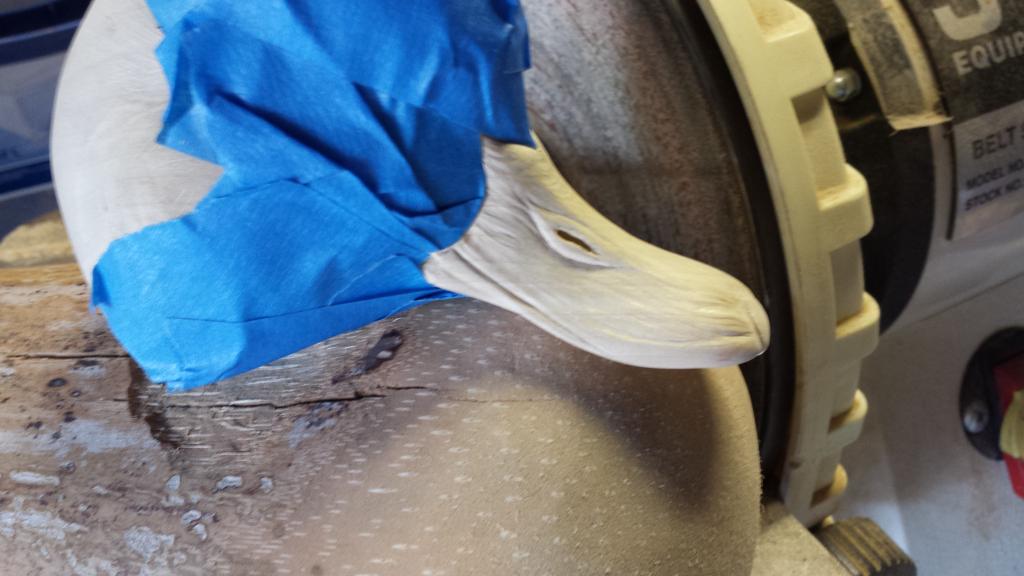
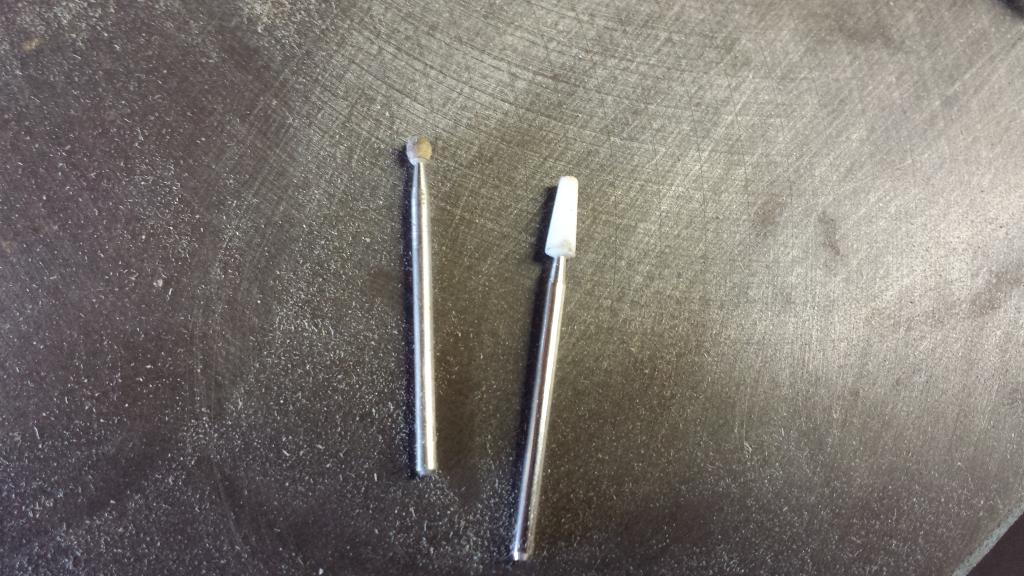
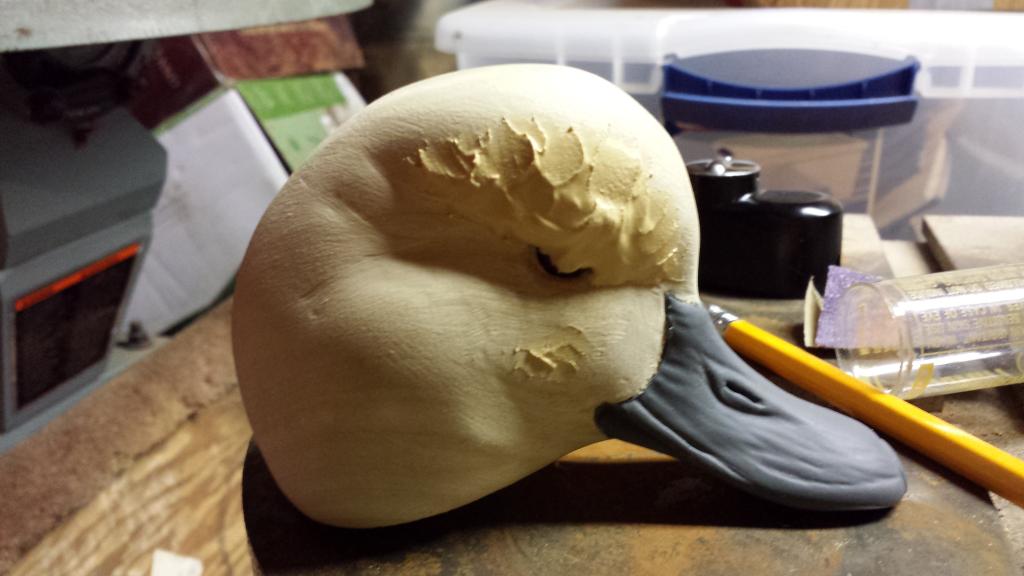
Ok I got the bill detailed. I used a cone shaped bit, white stone and a ball tip white stone. after carving in the detail, I then come back and add the veins and wrinkles. I go deep because i use a sanding primer that will fill in any imperfections. I then use the ball tip and go over every wrinkle and smooth out any rough or sharp edges. Then I spray a light coat of gray Krylon primer. It dries super fast and seals the bare wood. I recommend spraying about 5 coats and let dry in between coats. If you go too fast it won't cure..ask me how I know. ALSO, use only if you are using acrylics!!!

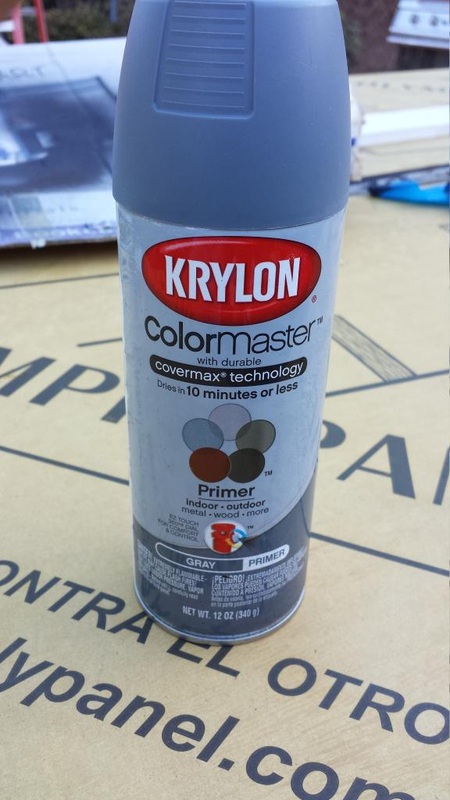
Use regular primer, do not use "Ultra Flat" be sure to read the finish on the can.
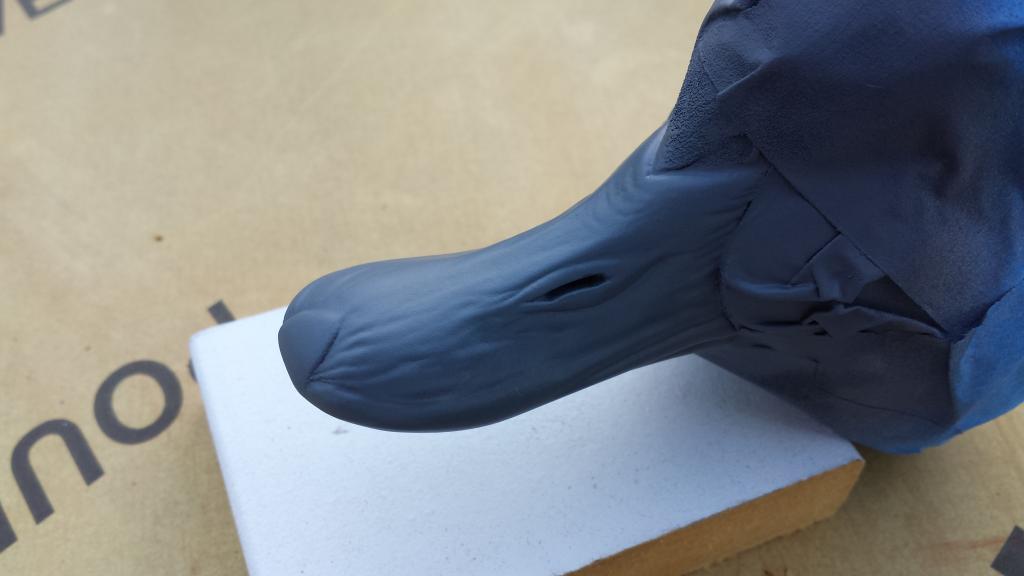
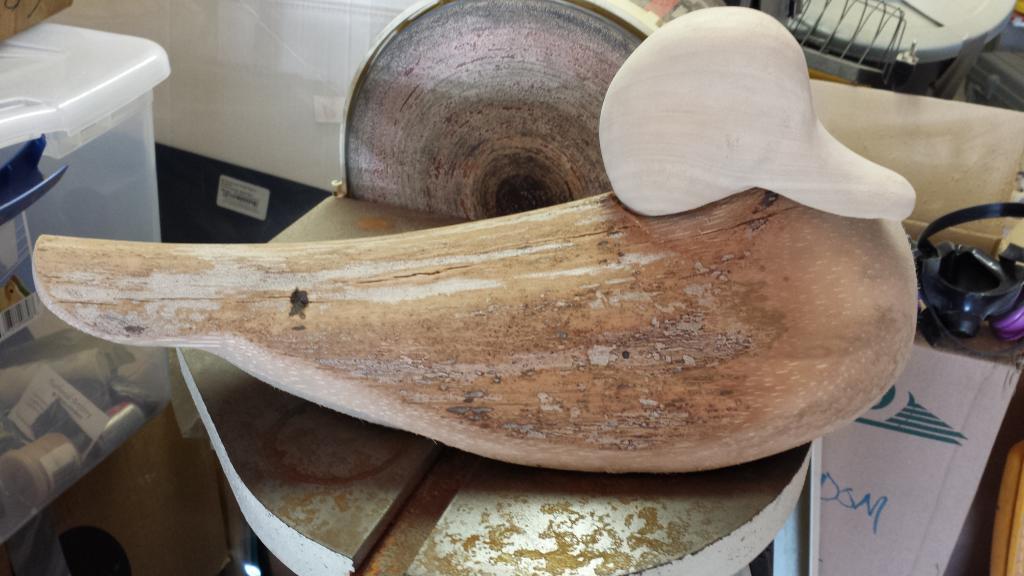
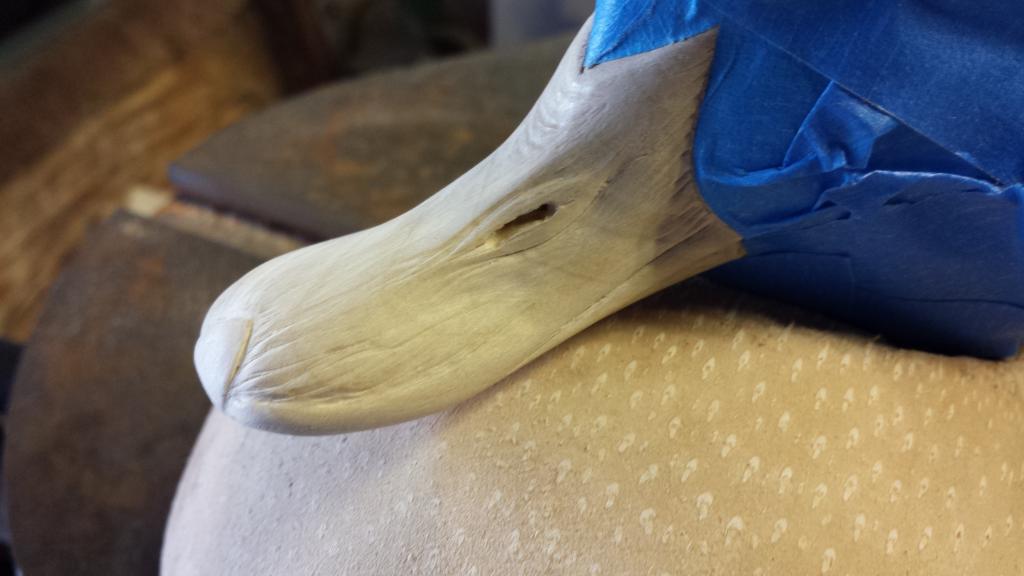
As you can see, perfectly smooooth! The deep wrinkles were filled in nicely. Be sure that in between coats, you hit it with some #0000 steel wool.
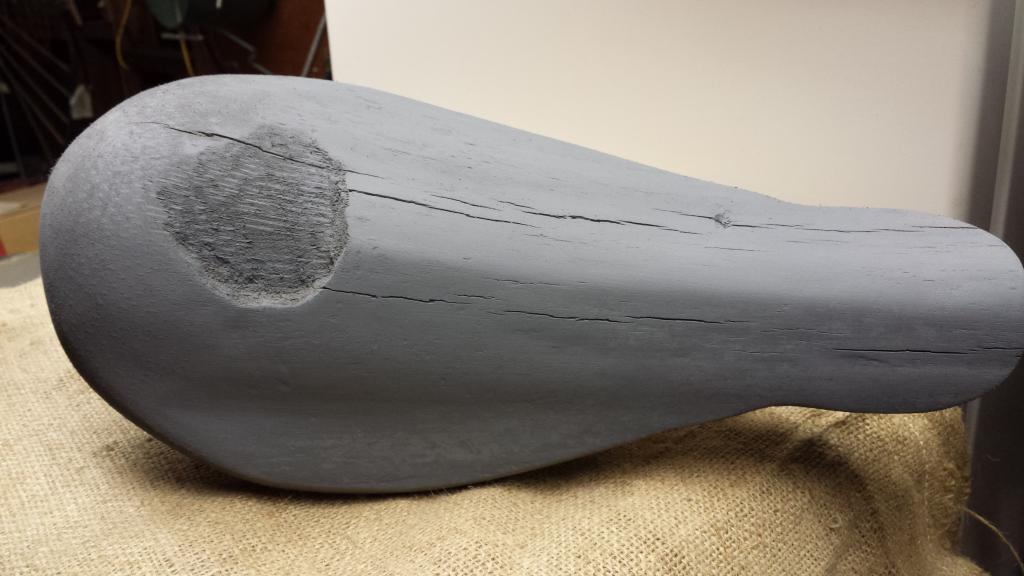
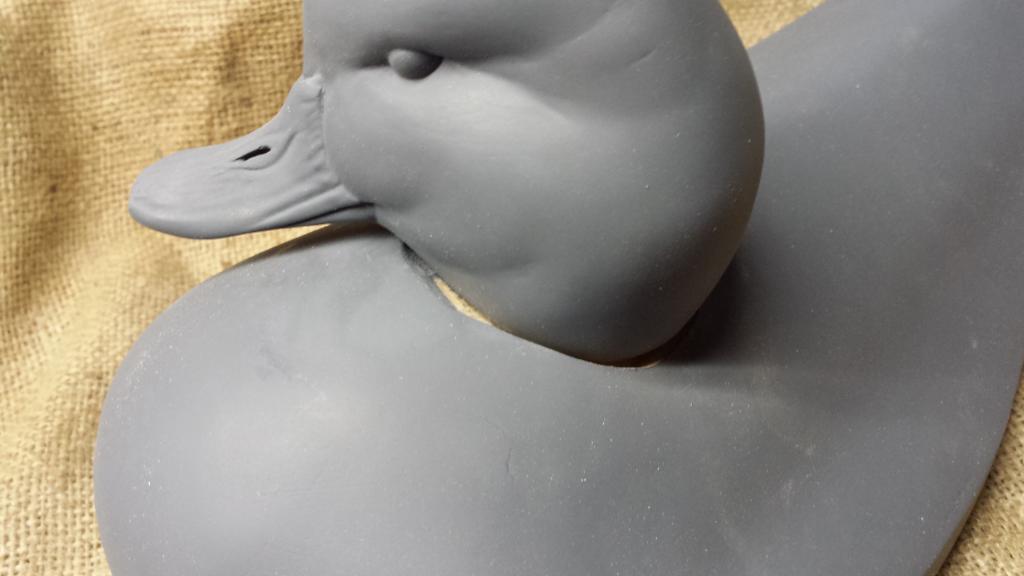
Eventually I will be spraying head and body with primer. I masked the head so Ican focus on just the bill. I always use a dark gray color primer to see the superficial imperfections. I will now work on the eyes...my weak spot... lol
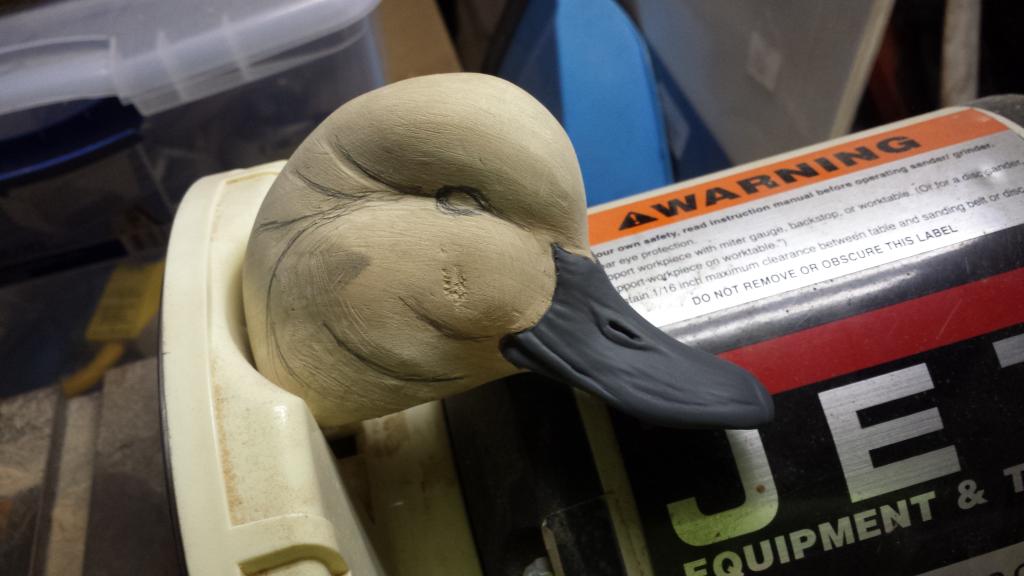
I draw in the eye and cheek definitions, on both sides
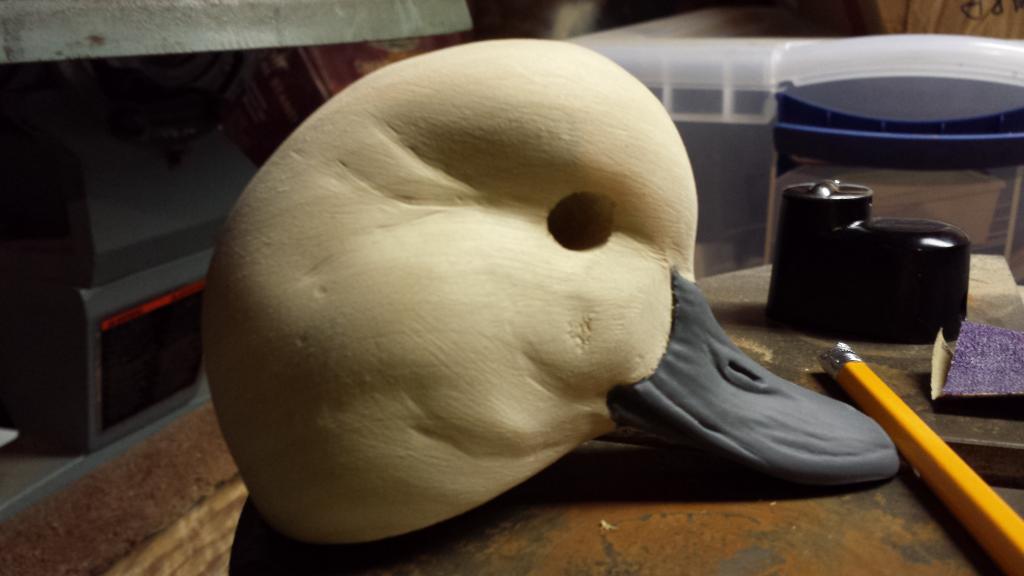
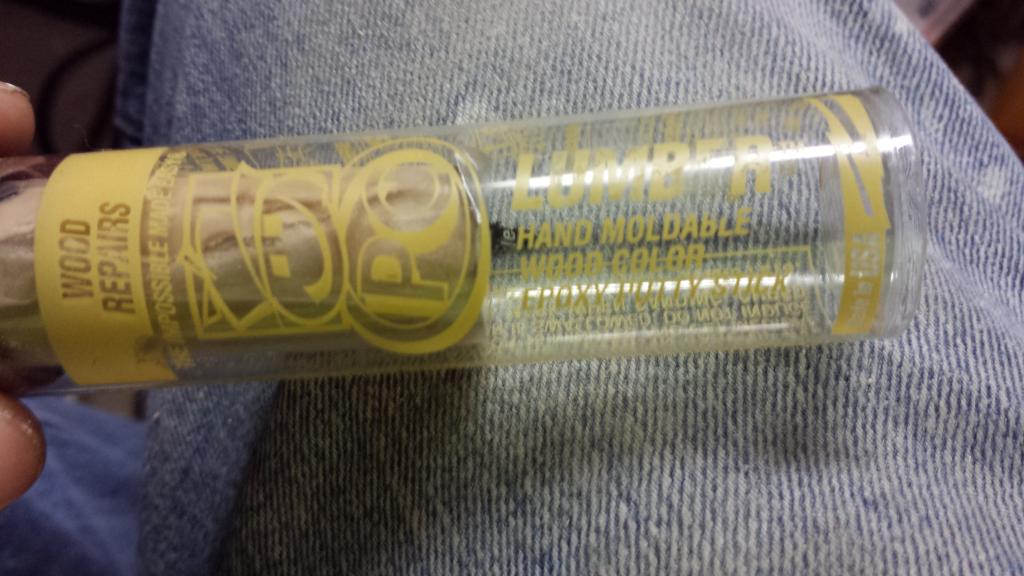
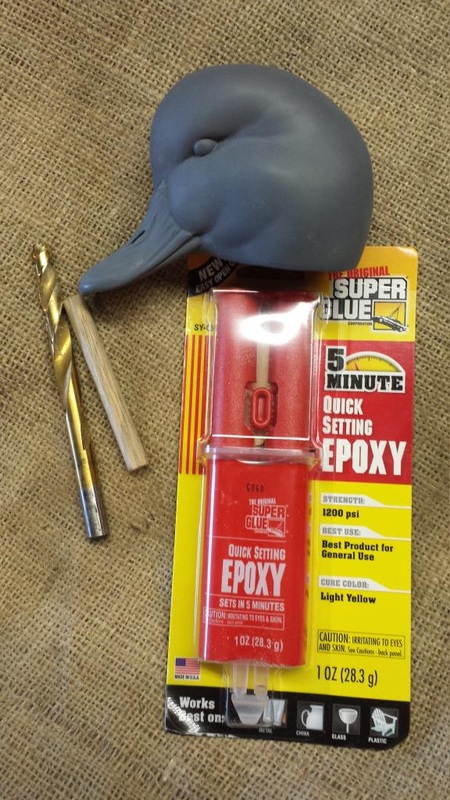
I will be using 10mm Tohickon brown eyes. I make the eye opening a bit bigger and use a molding epoxy that you can buy at any home improvement store.
this epoxy gives you enough time for you to set in your eyes perfectly. I fill in the eye hole about 3/4 of epoxy and push in the eye. You can scrape off any excess.


Once the eyes are in, and cleaned up, I then use Tuff Carve to add the eye brow area which gives the bird character...that mean look.
Looks messy..but most of the excess filler will be removed and shaped.
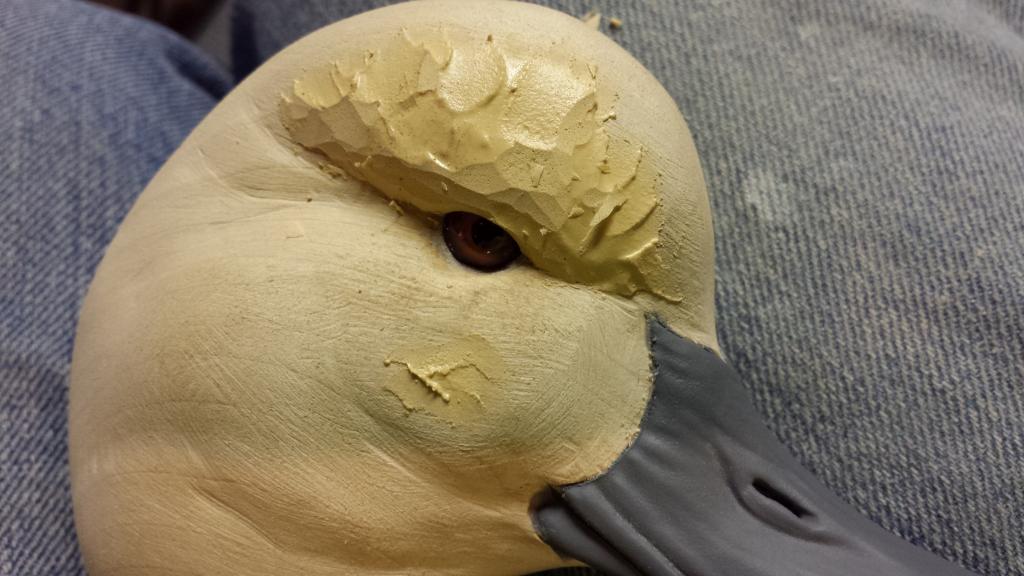
Starting to build character. I will begin to sand and detail the eye socket area.
I forgot to mention that when ever you use a filler..I trim/shave off excess with my knife while still soft to avoid sanding and to keep it to a minimum.
.....How many coats of primer would you say it takes to get it to look like that?.....do you seal the bill first or is the primer acting as the sealer?.....what is the drying time in between coats?I would say about 5 coats and about 15-20 minutes in between coats. I went fast on a bird and it didn't cure. Once it hit the water and the sun..it cracked. I use steel wool to get any fuzzy s out and 320 sand paper. The smoother you get
the bill prior to the primer the smoother it will look. but steel wool is fine. If it still looks a little fuzzy...hit it with steel wool. And proceed with more primer. I don't seal it with anything. The primer is also a sealer.
the bill prior to the primer the smoother it will look. but steel wool is fine. If it still looks a little fuzzy...hit it with steel wool. And proceed with more primer. I don't seal it with anything. The primer is also a sealer.
I spent some time sanding the head really good. If you still see those tough scratch marks, don't worry. The primer will fill in all that. I cleaned up the eyes and over looked everything to make sure it was ready for primer. I usually primer the head first, especially a low head position, that way I can primer/seal underneath the neck area. I like to add quite a few coats around the eyes, to make sure everything is filled with primer. I hate that caked on filler look. Needs to be smooth and clean.

Here's a front view. All you beginners, feel free to ask questions. Doesn't have to be about this bird .. whatever I can help you with. No problem, shoot away!!!!!!!!!!!!!
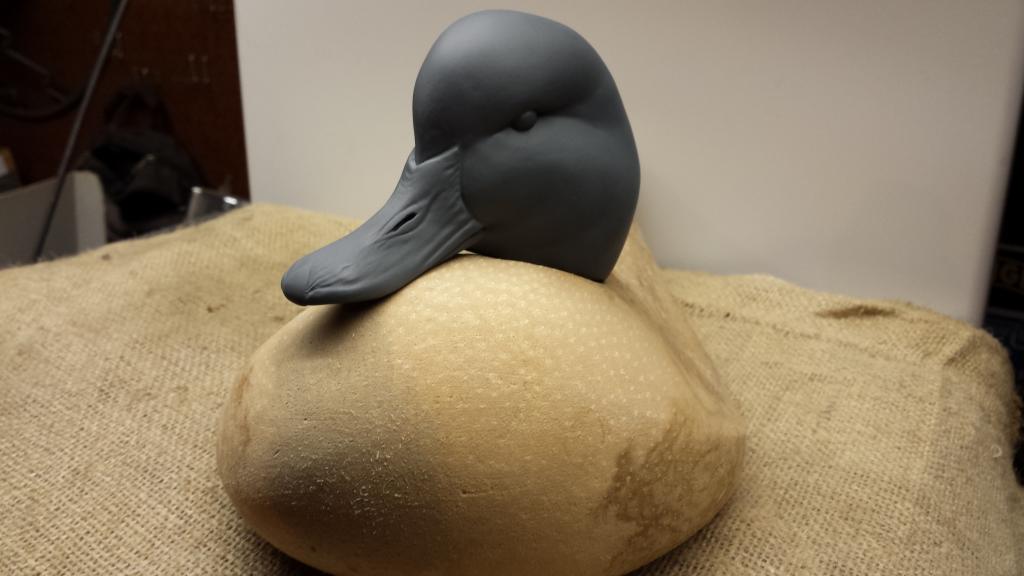
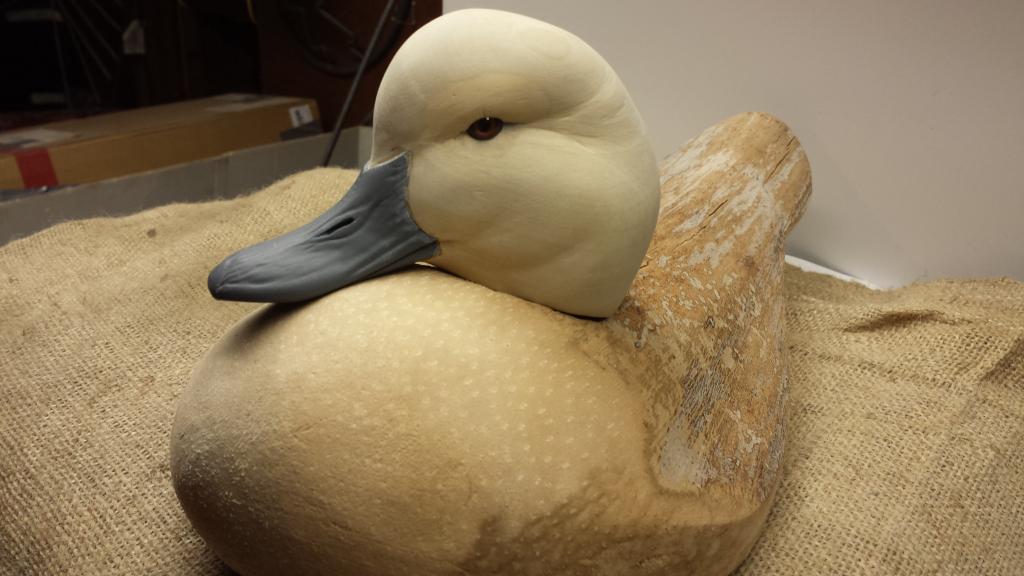
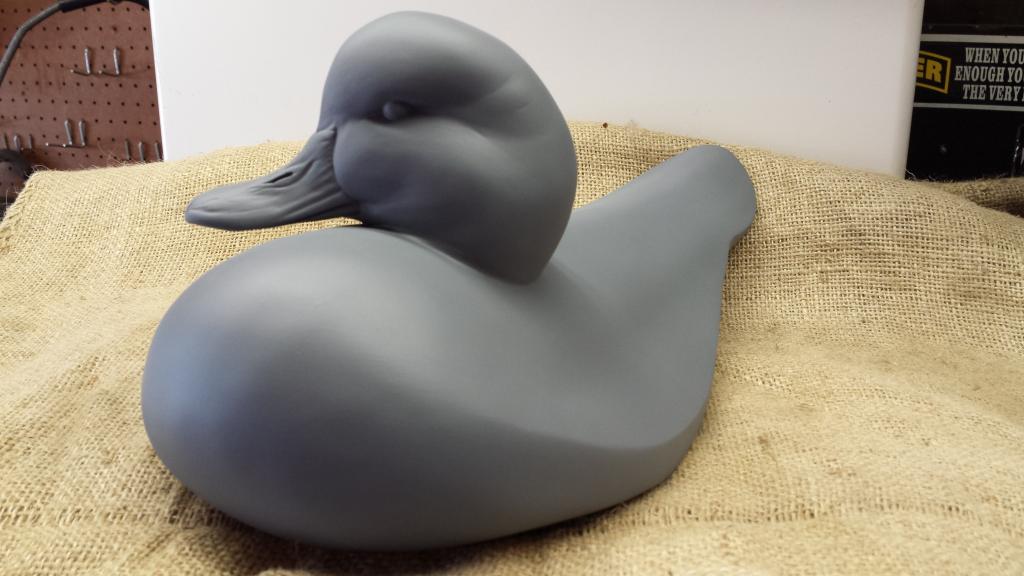
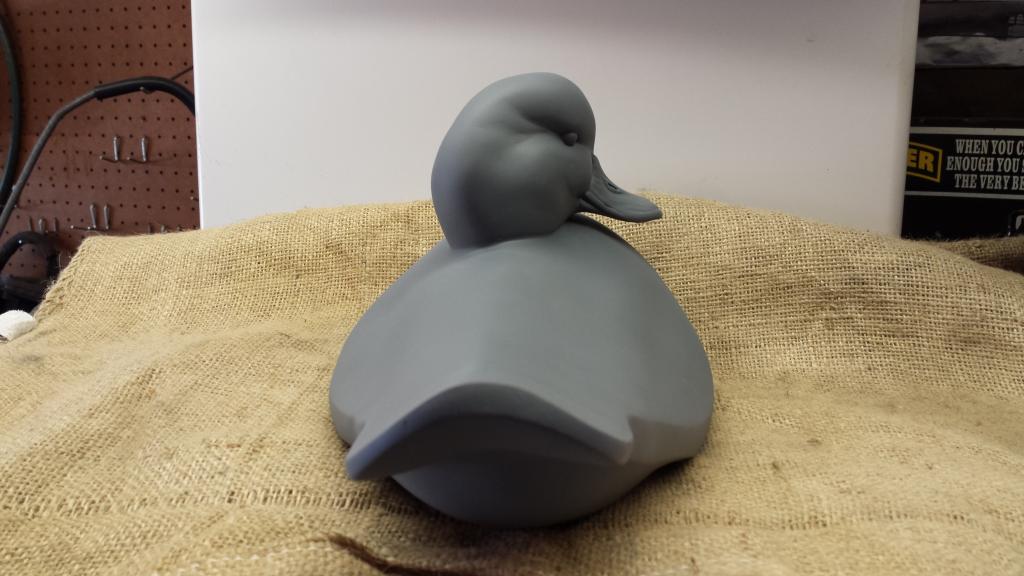
Head is complete and primed. I will now start on the body.
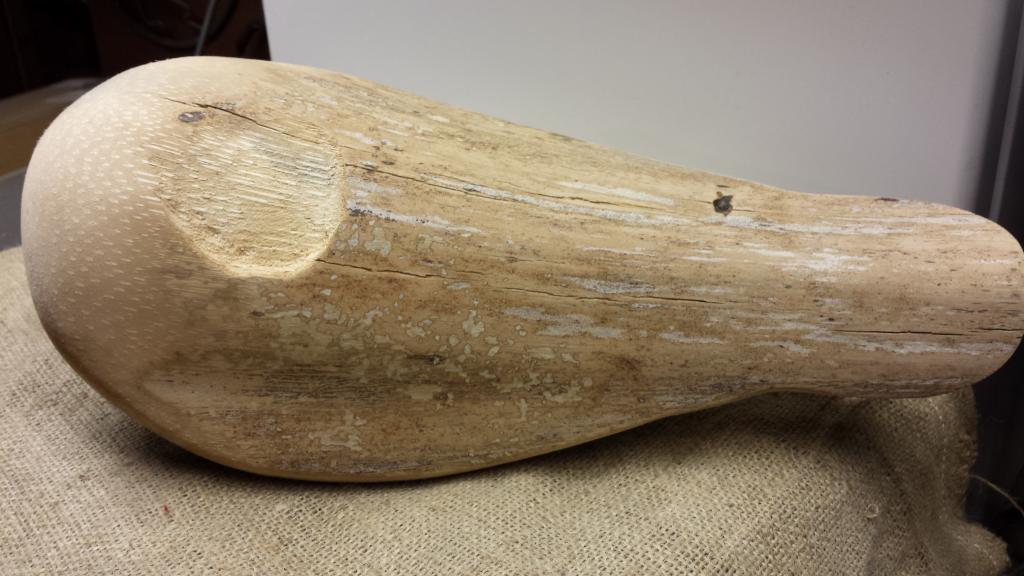
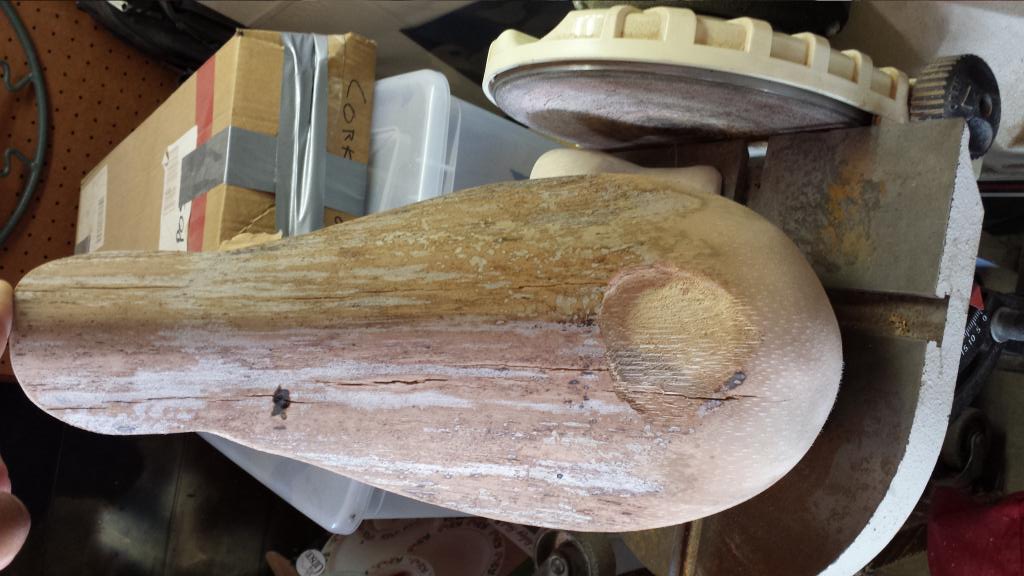
The frond body has been shaped and rough sanded with 80 grit. I will eventually skim the entire body top and bottom, filling in any imperfections and gouges. But before I do that, I prime the entire body. Fronds have a waxy film on top shell. So even though I've sanded the body, I really want the filler to stick.
All cracks will be filled. All fibers visible will be sanded out as well.
Feathers. How do you shape your Fron without it getting all chewed up? There is no way it can be carved right? when cutting out on a bandsaw..I leave about a 1/8 BORDER around your pattern line. Do not try to shape with a fordom or dremel. I use a palm sander to shape with 80 grit sand paper. Leaves a clean line. The shell is about 1/16". All I do is shape contour out line and shape rump area..
TMatus
the fronds that I have cut into all depend on how the frond is dried and at what state it is. I have seen them soft and light, very similar to foam, or really green, where a knife goes through them easily, but the inside is doughy? I havent' carved them when they are super fresh from teh tree so I can't explain that part very well.I do know this, if you get a few and keep them in the Idaho Climate, well, hit them with a kutzall and they carve so fast all you see is dust, they can be tricky to shape. I practices on a scrape piece I cut off to see how it would react to the grinder.Also, once you break through the outer shell which is really hard, the inside is then very soft and that is where the mistakes happen.
Since this is not a decorative. .I use spot filler on any stubborn gouges or scratches. I hate the fibers showing as well so this bird will be slick through out. Though this will not be a competition bird (I don't think it will)..it will have a nice paint job.

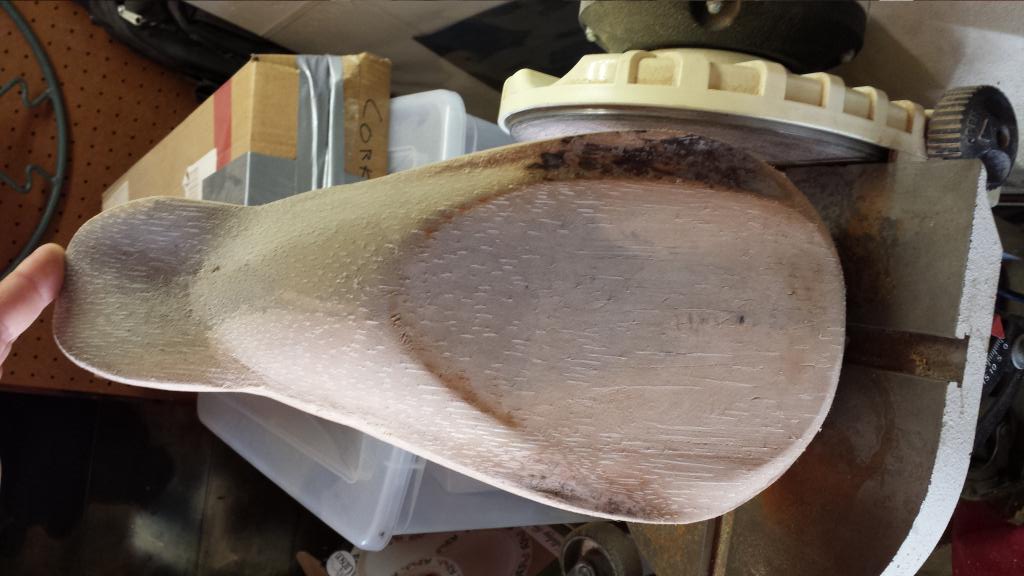
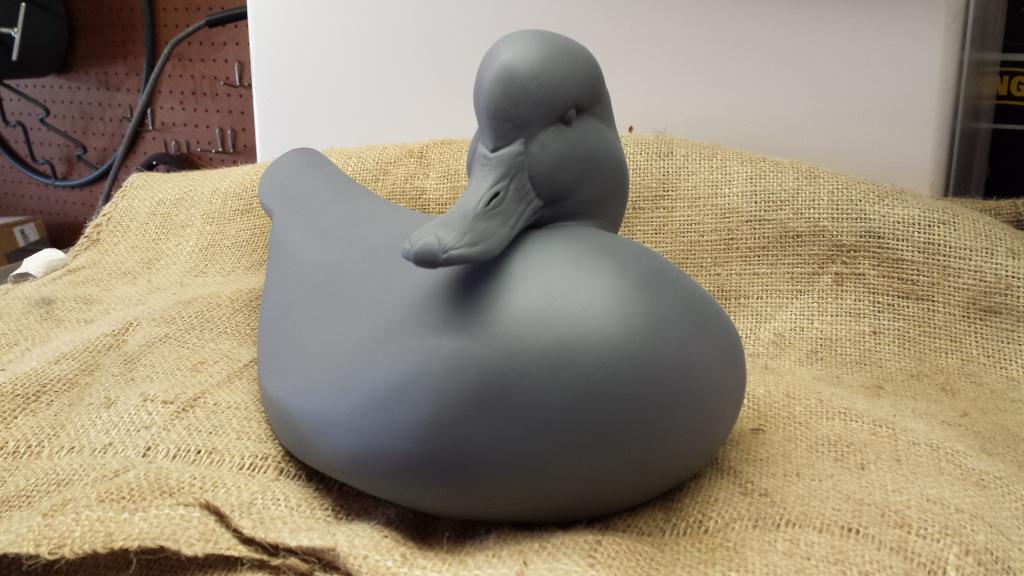
Ok I started to skim coat the entire body with Tuff Carve, filling in all deep scratches and cracks if present. This will take a few coats of filler and sanding until you get it flawless. Or if you want to add texture by combing or spray texture, then it doesn't have be perfect, since it will all be covered. I chose to go smooth all the way.
It's pretty much sanded. I will primer it and check for flaws. If flaws are still present, then I will fill with spot putty and sand. I do a final with 320 grit and prime again. I usually go through an entire can of primer to achieve the smooth finish.
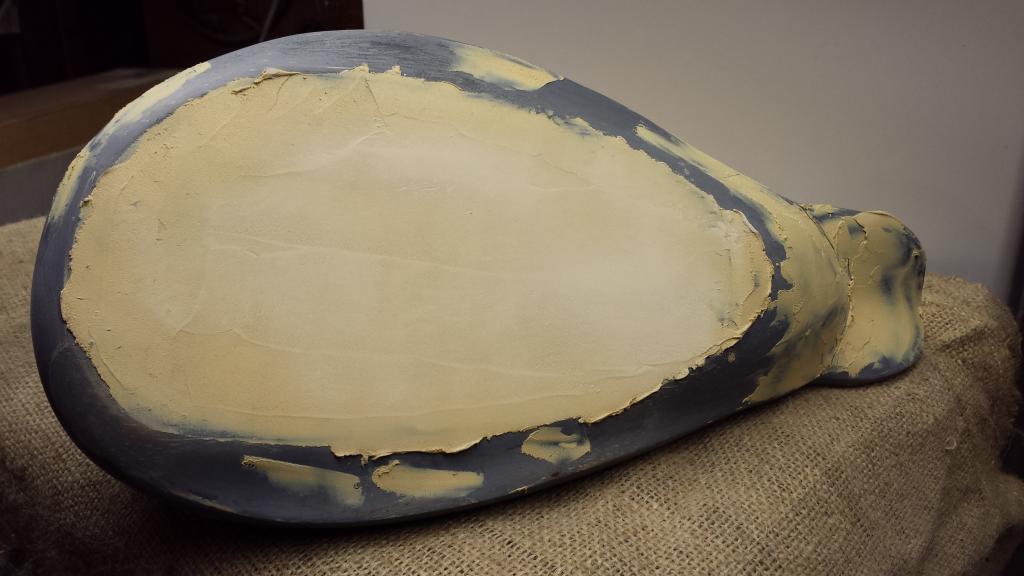
Bottom side, If I decide to float, then i can add weight if needed. No Keel
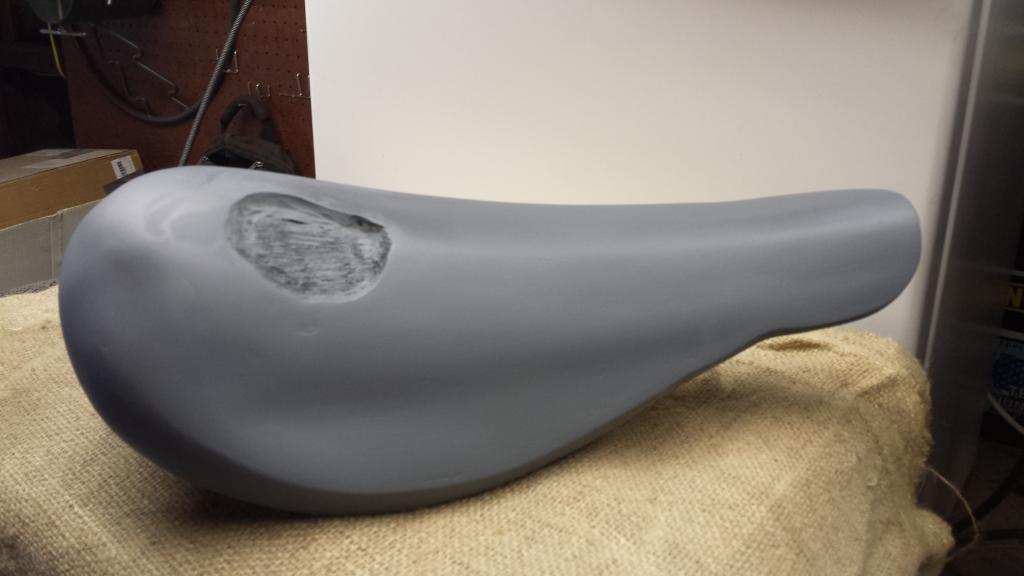
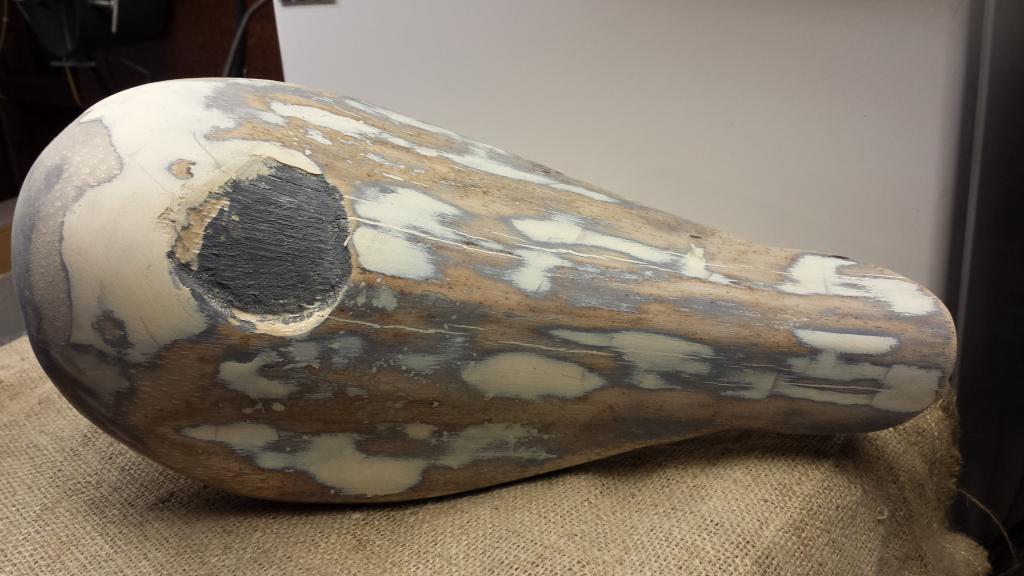
Top view primed...not a 100% smooth yet..
I use a two part epoxy and a wood dowel that I will be attaching to the head and inserted into the body. Then I will fill neck joint once I position the head where I want it. If your neck joint gets over sized, do to positioning of the head..as I have done. Don't worry, just fill with filler. Everyone makes mistakes .. ESPECIALLY me, so mistakes will come and go.
The neck joint will be filled as stated. I will add a little filler to build up the neck area , showing a soft transition.

This is the spot filler I use. And you don't have to use Tuff carv , since it is a little pricey. Bondo works too.

I did a final spot fill through out. Filling little pit holes and scratches with 320 through out and a final coat of primer.
Here is the end result.

Ready for battle! Thanks to all who followed this short tutorial. Fronds are a lot of fun. Easy to work with and no carving. No rules in the category other than it better look like a frond. I see a lot of artists miss that. the body can be a little time consuming, if you want a flawless slick bird as I have demonstrated. Again this is how I do it, and you may have your own thoughts on how I achieve certain areas of the frond. I hope this helps you out a little on fronds.
The second part
" Painting a frond"
The second part
" Painting a frond"